Get ready to be impressed… we completed not one, not two, but THREE projects this weekend. When I say “complete,” I mean, almost, kinda, sorta, not really, half-way finished. That’s what you mean by complete, right?
I’m getting close enough to the Master Bedroom reveal that I don’t think I’m going to show you any more wide shots until the room is complete. I’m a master of suspense, you know. So here are glimpses of our projects.
Project #1: Stenciling

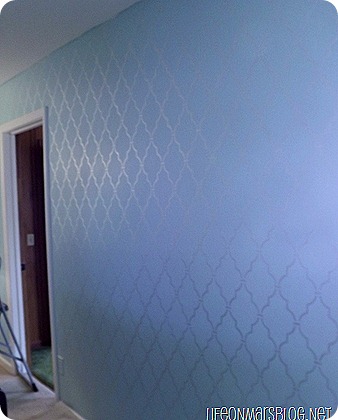
I love it! I love that it’s so subtle and almost disappears in some light. For a full tutorial on stenciling, check out my POWDER ROOM. I stuck with the Royal Designs Studio’s stencils. I loved the product the first time, so why change a good thing? This was the Casablanca Trellis Moroccan Stencil.
This time around I was able to learn from my mistakes the first time. This one was SO much easier though for a couple of reasons:
- It was a much less detailed stencil, so less area to fill.
- It was only a single wall, so fewer corners and I knew we were putting up crown molding so I didn’t even worry about going all the way to the ceiling.
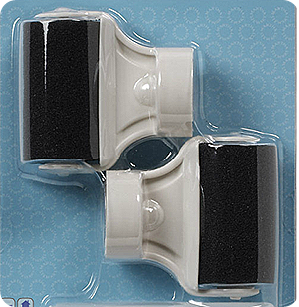
- The greatest invention EVER:

These rollers attach directly to the top of Martha Stewart Crafts paint. Just squeeze and roll… it was kind of amazing. These are $9.99 at Michaels, $6 with a 40% off coupon. Worth ever penny.
FYI… if you’re using something other than Martha Stewart Craft paint (first, why would you do that????), it comes with a little bottle that can be filled with the paint of your choice.
PROJECT #2: Crown Molding

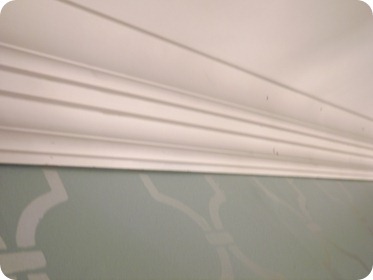
I’m going to take a paragraph to tell you how amazing my husband is. He’s never don’t crown molding before and I think he did an AMAZING job. We haven’t caulked, puttied or painted yet, but it’s all up, the corners meet and it looks great.
He doesn’t think he did a good job for a couple of reasons.
- He cut the pieces wrong the first time because we assumed we have 90 degree angles. NEVER ASSUME THAT. Apparently, that’s kinda rare. So he correctedt he angles, and it all went smoothly after that.
- He says that there should be very few visible seems at the corners. To me, that’s like saying that there shouldn’t be any nail holes either. That’s what putty is for!
I also need to thanks some friends:
- Shari, who I work with, gave us the name of a SUPER cheap building supply company. Like 5” crown for the Master Bedroom and Master Bathroom for $100 delivered (not kidding).
- Tyler, who let us crash his house for the entire weekend and use all of his equipment and handyman know how.
- CRAFT. I won a $100 giveaway from this blog and Amazon Serve, which paid for the molding.
PROJECT #3: EURO SHAMS

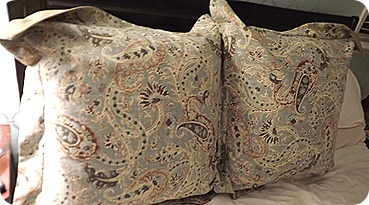
These were so much easier than I thought they would be. I followed a tutorial from Coleman Chronicles. I really don’t think there’s any reason for me to post a tutorial because she did a great job with hers.
I need to do one more. I had hoped to get away with 2, but I definitely need another one. See that gap on the right side? Yep, they need a friend over there.
So that’s my weekend! I feel super productive. Here’s where we are with the Master Bedroom To Do List:
- Paint walls
- Stencil accent wall
- Install crown molding
- Caulk, putty and paint crown molding
- Paint closets
- Replace hardware on closet doors
- Make bedskirt
- Make pillows for bed
- Make curtains
SO CLOSE!!!
