How to Spray Paint Fabric {Striped Curtain Tutorial}

Happy Friday! As promised, here’s the tutorial for spray painting fabric or in my case, curtains.

I finally finished them up and hung them on Tuesday. Right now, they are behind the bed, but it’s not my favorite. I am going to try to live with them for a few days and then move the furniture if I can’t stand it.
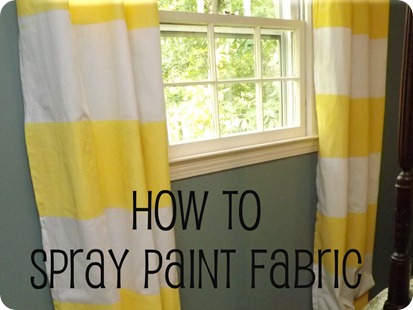
How to Spray Paint Fabric

Disclaimer: this is a long one. Not because it’s difficult but it is a little “step intensive”

I did tons of some very little research before I picked up my spray paint. However, through trial and error, I was able to make things a little simpler for you.
SUPPLIES

    • Painters tape
    • Thin Plastic Drop Cloth
    • Fabric

How to Spray Paint Fabric
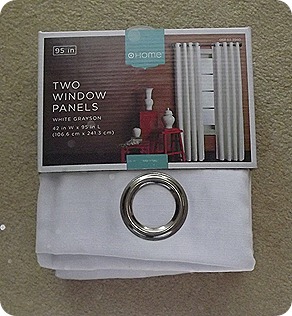
tip: I bought my curtains from Target. They were $30 for a set of 2 95” panels with grommets. That breaks down to about $5/yd and I didn’t have to sew them. You can’t really beat that.

    • KRYLON spray paint (2 cans per curtain)

tip #2: Krylon lists fabric as one of the approved surfaces. CLICK HERE for my comparison of different spray paint brands. Also, I’ve been told that there’s a product called Simply Spray from Hobby Lobby that is made for fabric, but it’s more expensive than Krylon.
PREP
As with most painting projects, the most important step is prep. In order to get crisp lines, you want to be very careful in this step.

  1. Determine your stripe widths. You want to stick with odd numbers of stripes. My fabric was 95″ high, so I chose 9 stripes. So each stripe was 10.5”, except for the bottom one which was 9.25”. You can’t tell.
  2. Determine which stripes will be painted and which will remain white. This is important for tape placement. I wanted to have more yellow than white, so I started and ended with a yellow stripe.
  3. Using a fabric pen and a ruler, make a small mark down each side and in the middle every 10.5”.
  4. I used a long ruler line up my marks. The ruler helps you get a straight line all the way across. Using the ruler as your guide, lay the painters tape along the marks.
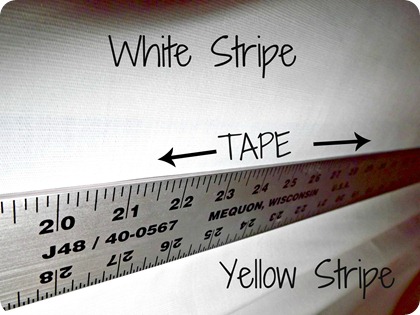
How to Spray Paint Fabric
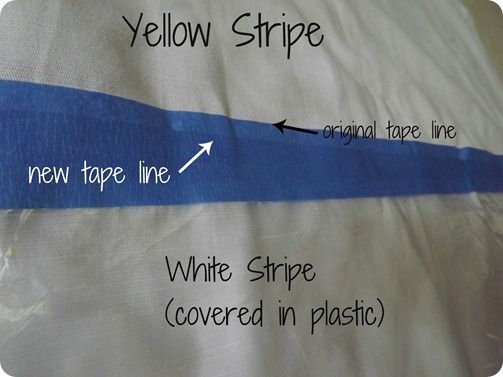
important tip: ALWAYS put the tape on the white side of the line. This is kind of hard to remember. Your white stripes will look smaller than the yellow stripes because the tape will be covering up 1” on either side.
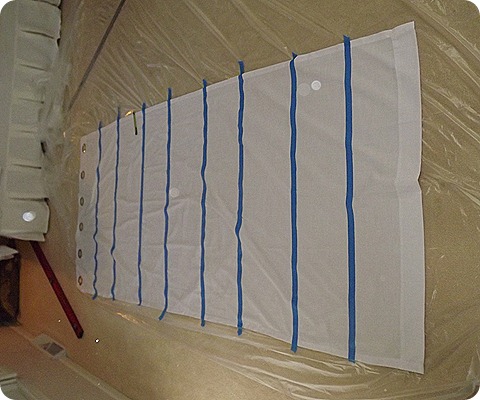
How to Spray Paint Fabric5. Cut your drop cloth into 10.5” strips. I actually just laid it on top of the fabric and cut over the lines. Leave enough on the edges to be able to wrap it around the back of the fabric. You’ll be spraying the edges.

6. Using the painters tape, tape the plastic strips over the white stripes. Be sure to overlap the existing tape some. Wrap the tape and the plastic around the edges of the fabric and secure to the back.

tip #3: Be sure that your fabric is flat anytime that you are applying the tape.
How to Spray Paint Fabric
7. Wrap the grommets in painters tape. I sprayed it once without doing this and it was much easier to wrap them than to get the paint off later.

Now repeat the entire process for all of the stripes. I had 36 stripes. I did this process in stages. because it was not super fun work. Though I still think it was faster than painting the stripes with a brush. You’d still have to do everything exactly the same except for steps 5 and 6.

Painting
1. Lay the fabric on a drop cloth outside. Spray on the first layer pretty thin. You’ll still see white through it.
2. It dries very fast. I sprayed on my second layer within 15 minutes after the first. The second layer should completely cover the rest.
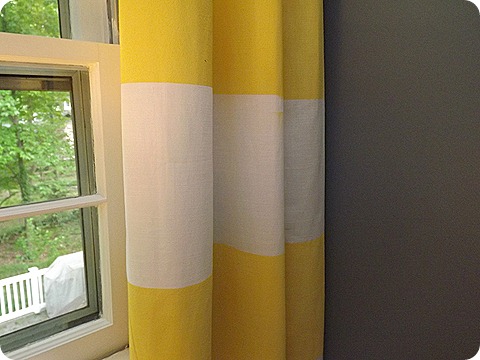
3. Pull off the tape and plastic! This was by far my favorite step. You get to see your pretty crisp paint lines:
How to Spray Paint Fabric
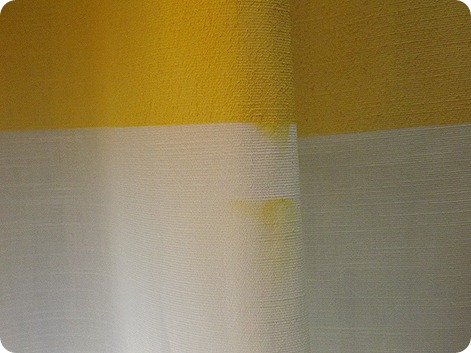
If you accidentally punctured your plastic, then it might not be as happy because you’ll see it:
How to Spray Paint Fabric

But the good news is, once I hung them, I took me forever to find this little mistake. It kinda disappears. The end result is significantly softer than regular paint and you can still see the texture of the fabric through the paint.
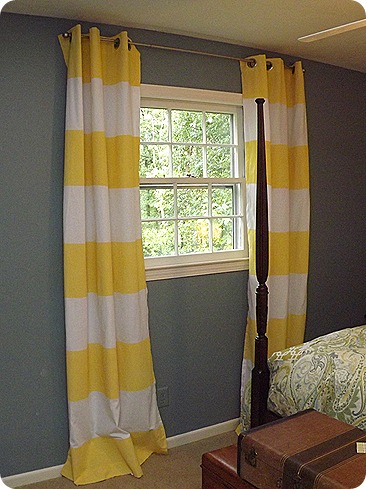
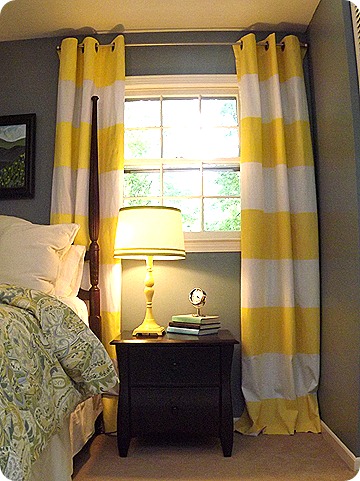
How to Spray Paint Fabric

How to Spray Paint Fabric
How do we feel about the bed in front of the curtains? I don’t hate it as much as I thought I would, but I definitely don’t love it. Do I leave it or move the bed to the other side of the room?

You’re Invited to a Baby Shower!

I hope you’ll be able to make it… it’s TODAY!!!

A few blogs are getting together to throw a virtual baby shower for our sweet friend, Kelly from View Along the Way. The party is being hosted by Erin of His and Hers.

kelly-marzka-virtual-baby-shower-invite
Kelly is one of the sweetest, funniest, most creative people that I’ve met since I started blogging. She’s a constant encouragement to me. Plus, she really takes it a step further and actually offered for me to stay at her house during the Haven conference in June. No, I’ve never met her in person. Yes, she invited a complete stranger to stay at her house.

That is, if you consider a complete stranger someone who I consider a good friend who I email with twice a day… so not really a stranger at all. Isn’t this blogging thing strange?
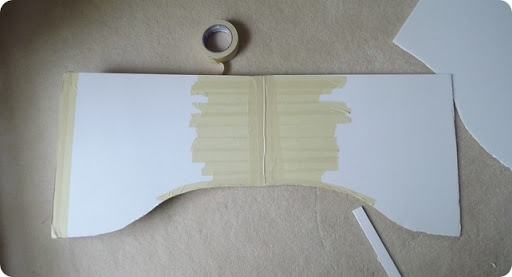
I am providing the baby shower games for the party today. Now, I’ve been to my share of baby showers and there are some strange games out there.

Example A) The Bottle Drinking Game
This is where grown women try to suck some liquid out of a baby bottle. I would appreciate it if we just took that one out of the rotation.

Example B) Guess the Size of the Belly with Ribbon
This is the one where guests guess the diameter of the Mom-to-Be’s belly then cut pieces of ribbon to that size.

Why is it that we think the Guest of Honor would enjoy this game? In the future, if you play this game… PLEASE do the Mom-to-Be a favor and make your guess and then cut in half. It’ll make her not feel like she looks like this:

Huge-pregnant-belly-1
Yes, I think that’s a real person. Lord, help her.

So we’re going to play some games that Kelly would actually enjoy…

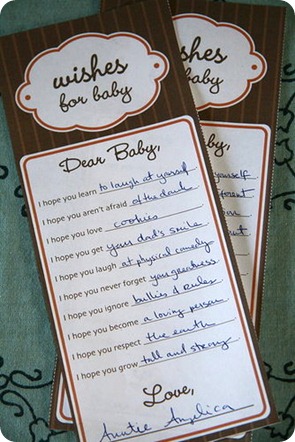
First, I think this is about the sweetest thing. Each guest fills out a little survey for the baby and parents to read.
776b019569fbc174_IMG_4794.xxlarge
Printable for for free in: BLUE and PINK or BROWN and ORANGE

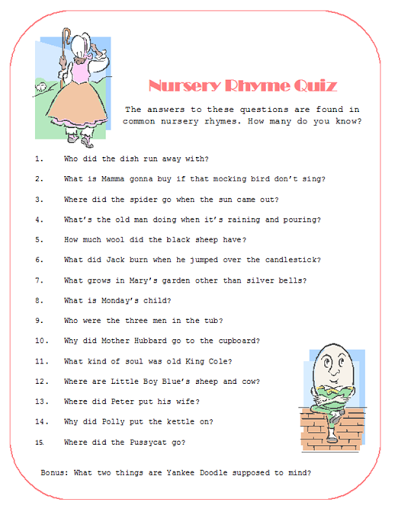
Then we’ll see how much everyone knows about Nursery Rhymes.
Nursery Rhyme Quiz
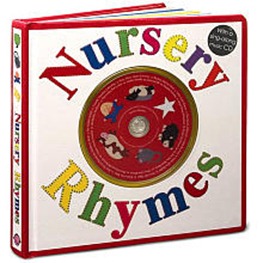
Whoever gets the most right wins. Then of course, we’ll have a gift for the winner, which is a book of Nursery Rhymes.

Feel free to print the above picture or I can send you a word document and the answers. Just leave a comment and include your email address. I’ll be happy to send them to you. Does anyone know how to load a printable version?

Kelly would get one too (even if she didn’t win):
pTRU1-3743760reg
Kelly, we’re so excited for you and can’t wait to meet your sweet little girl!

Now to see the enjoy the rest of the party, be sure to go visit these other blogs who are helping make this shower special for Kelly!

Skye and Erin are hosting.
Jen & Katie decorated.
Ange whipped up our appetizers.
Visit Faith for a pink dessert.
Carrie’s handling the punch.
Cassie and Michelle are bringing handmade gifts.

Lauren Amos Designs Giveaway

I am so so so excited about this giveaway! Today, I’m letting you in on my little secret for amazing jewelry: Lauren Amos Designs.
31238_402449704451_319106254451_3999346_6781213_n
Lauren is my cousin (technically, my cousin’s cousin) A few years ago, she started an Etsy store to showcase her incredible handmade jewelry. I’m pretty much obsessed with her earrings. Once year, I requested 6 pairs from my hubs for Christmas. I almost exclusively wear her baubles.

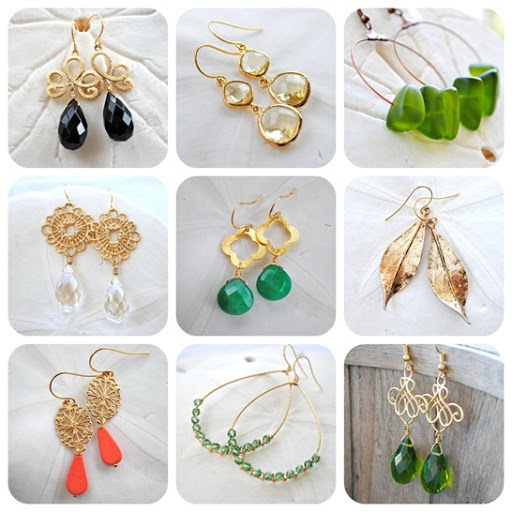
I couldn’t possible pick a favorite, but here are a few of my favorite earrings:
Earrings
Gorgeous, right? What if I told you that they are all under $30 and most of them under $25? Who doesn’t need a good source for inexpensive, handmade jewelry?

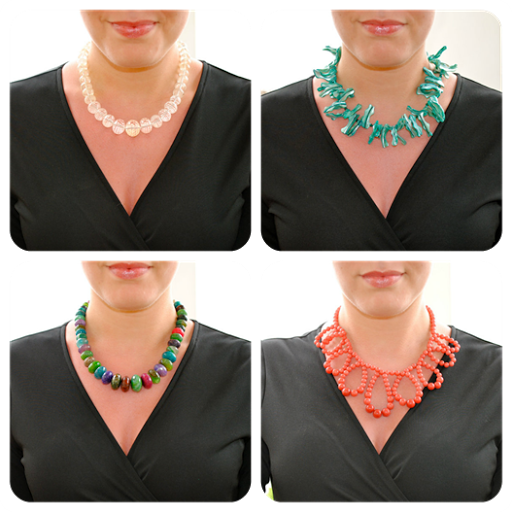
What about some killer necklaces?
Necklaces
How fun is the Flirty Coral Necklace ($50) and the Teal Seaweed necklace ($30)?

So do you want to know what you could win? Of course you do.

Lauren is giving away a set of her super cute Quatrefoil earrings. You get to choose your color: turquoise, white, ruby or black.
Giveaway
$25 Credit
You have a bazillion opportunities for entry. This giveaway is open to continental US and Canada. The giveaway begins Wednesday, June 6th and wraps up Monday, June 11th at midnight. This is my first time using Rafflecopter, so hopefully it works!

UPDATE: if you do not see the Rafflecopter to enter the giveaway just below this note, please let me know and I will manually enter you.

Good luck!

Mudroom Progress

Happy Friday! I know I haven’t been sharing a lot on our progress lately. It’s because both of our current projects, the mudroom and the Master Bath have looked like a bomb exploded recently.

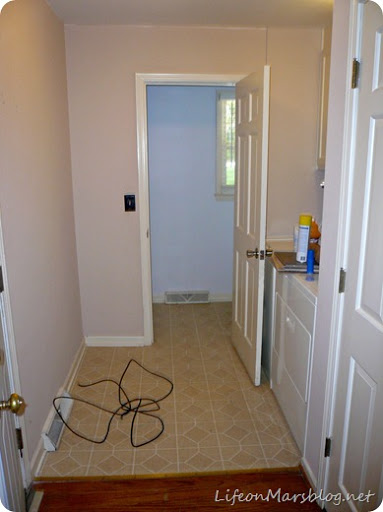
If you remember, this is where we started when we purchased the house:
Mudroom Before
Yep, there were two types of flooring in that room. We think that there was a renovation in the early 90s and that there used to be a wall where the flooring changes.

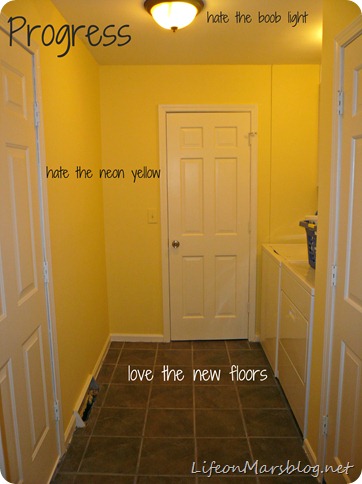
Mudroom Progress
When we moved in, we did a mini update with slate-esque (aka porcelain faked out to look like slate) flooring and changed up the wall color. In my defense, it was very buttery yellow in the store. On the walls, it was the opposite of buttery = NEON.

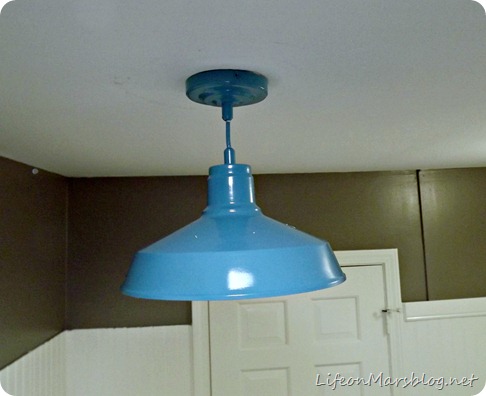
Then it pretty much stayed the same for a year, until we bought some a new washer and dryer and I begged and pleaded for mutually decided that it needed another facelift. We added beadboard and changed the wall color again. Last week we FINALLY changed up the light fixture:

DSCF3206
Fun, right? It’s a Home Depot light fixture that was all white and I spray painted the top. The bottom is still white. It was $50 which I thought was expensive, but it was exactly what I was looking for.

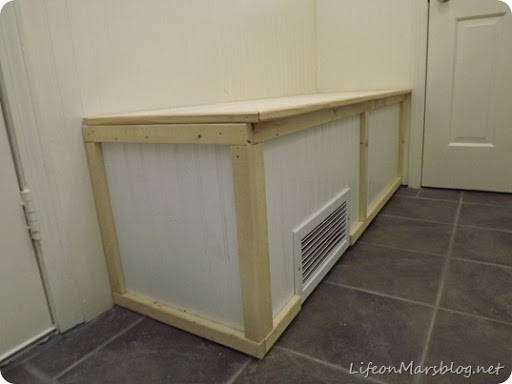
My husband has spent his free time over the past week or so building our new bench. I don’t think he minded too much because he was able to put his new nail gun to good use (that he got for his birthday):

DSCF3208
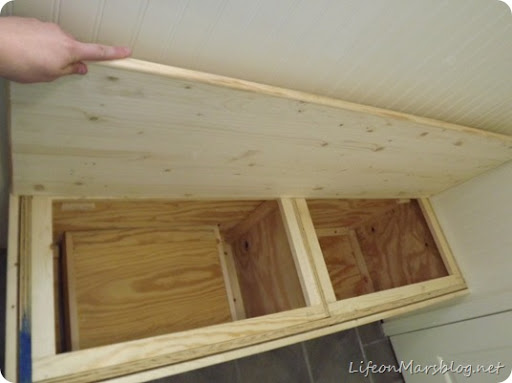
with storage for sorting laundry:

DSCF3209
Awesome right? I’m kind of excited about getting rid of the laundry basket full of dirty clothes that sits on top of the washer and dryer.

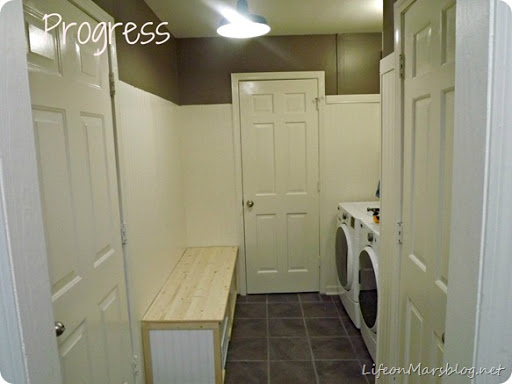
The sides will be painted to match the Linen White on the walls and the top is going to be stained dark, but that’s after some serious putting and wood filler. Here’s where the room stands now:

DSCF3203 edited
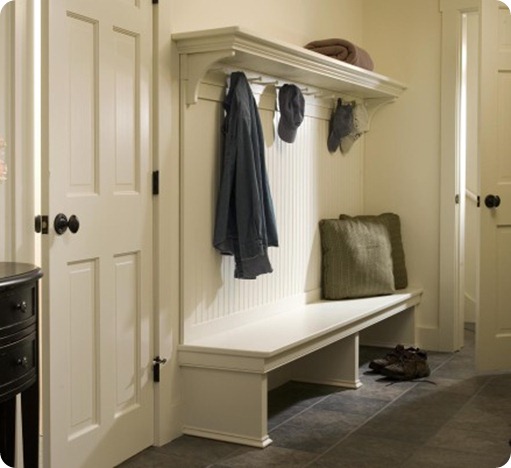
John is going to work on the shelf over the bench next, but I think we’re getting a lot closer to our inspiration picture:

36662184436089906_FqSOs0Du_f
We saw this picture and realized that it’s really the same setup as what we have in our room.

Any fun plans for the weekend? I’m going to my niece’s dance recital tonight and yard sale-ing in the morning. Wish me luck! I hope I find some good stuff. I haven’t had too much luck at the yard sales this year.

Bathroom Tower Update

I hope you all had a great weekend! We had beautiful weather here and on our trip to Ikea Charlotte. We got our countertops and guess what else…

NOTHING! Can you believe that? I’m half super proud and half horrified… what a missed opportunity.

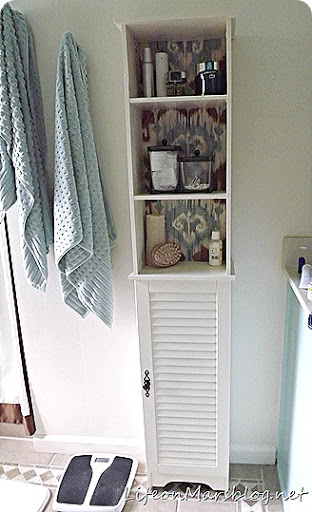
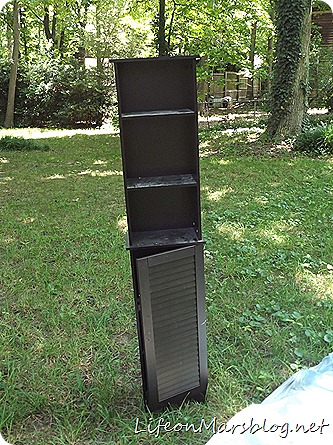
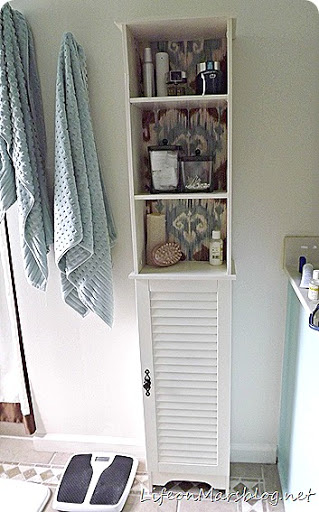
In other news… I finished the final project of the master bathroom this weekend! We have this super cheapo cabinet in our bathroom but it was dark brown and didn’t go with the lighter color scheme in the bathroom, so I updated it:
Bathroom Tower Update
Here’s how it started:

Bathroom Tower Update
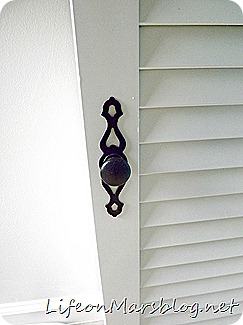
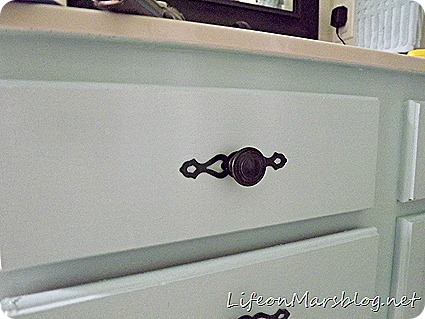
So I primed it and spray painted it with Rustoleum’s Heirloom White. I had a hardware backplate leftover from updating my cabinets, so I used it on the door. I really like how it pulls this piece in with the cabinets:

Bathroom Tower UpdateBathroom Tower Update

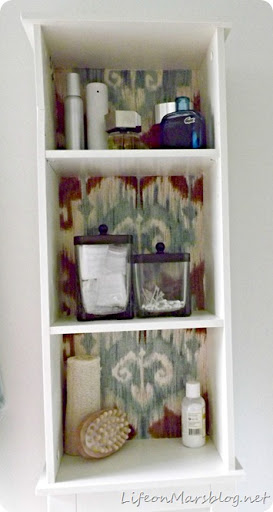
Then I used some leftover fabric from my DIY Upholstered Valance, cut it to fit and used Elmer’s Craft Spray Adhesive to add it to the back of the open shelves in the cabinet:

Bathroom Tower Update

Don’t you love quick projects? I think this took me 3 hours beginning to end (including drying type for the spray paint).

Bathroom Tower Update

I think it looks much better in the space and not quite as I-bought-this-off-the-shelf-at-Walmart. (Not that there’s anything wrong with Wally-world. I certainly do my fair share of shopping there). Plus, since I only used stuff I had on hand, this was a $0 project!
Since this was the final project in this room, the Master Bathroom is officially complete. Look for a reveal later this week (when I clean up a little and get around to taking pictures).


Beautiful Bridal Party {Bridesmaids’ Luncheon}

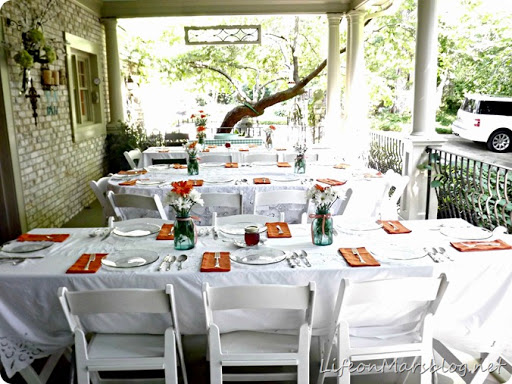
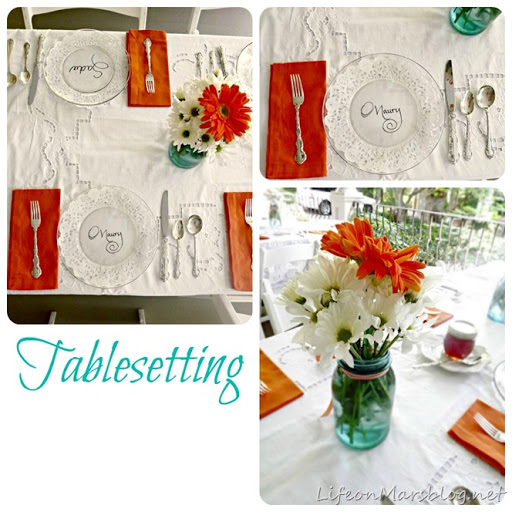
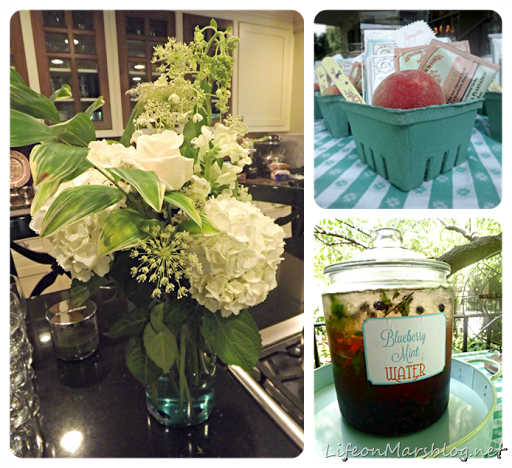
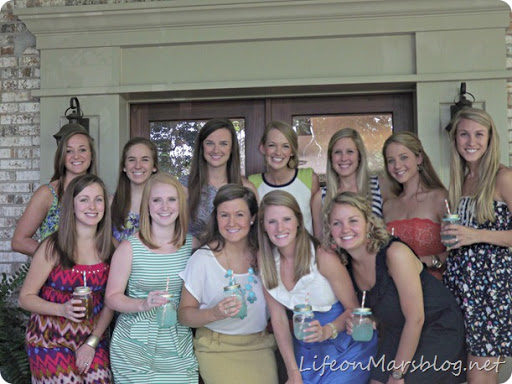
Have I mentioned to you that my Mom is amazing? She’s funny, kind, loving, generous and SERIOUSLY knows how to throw a party. On Friday, she hosted a bridesmaids luncheon for a sweet friend. It was something out of Southern Living. The palette was all pale blue and orange, which was really fun and bright for a summer party.

Prepare for an overload of beautiful pictures:

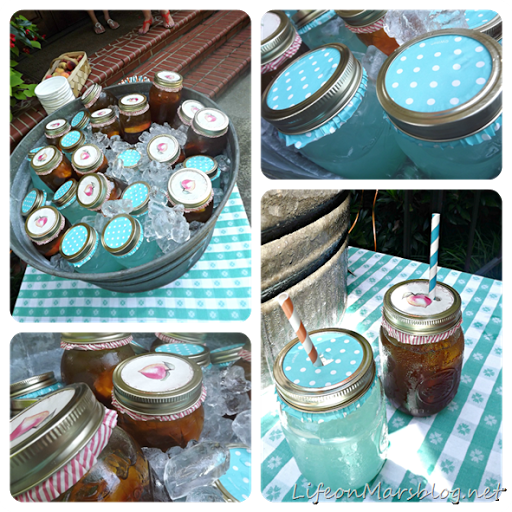
Guests were greeted at the door with their choice of Peach Sweet Tea or Low Country Lemonade. Since the temperatures were pushing 100 by this point, the drinks went quickly:
Party Decorations
Tip: The paper tops are actually cupcake liners! They fit perfectly over the top of a 12oz Mason jar. Who knew?

My parents back porch looked beautiful.
Party Decorations
As I was taking these pictures, I realized that I really ought to show you more pictures of my parents house. It’s beautiful and has tons of really unique details.
Party Decorations
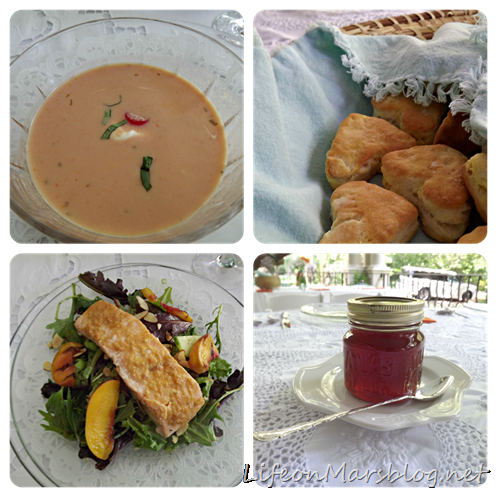
and the food was incredible. Chilled Tomato Bisque, biscuits with honey and Grilled Salmon and Peach Salad.
Party Decorations
Party Decorations
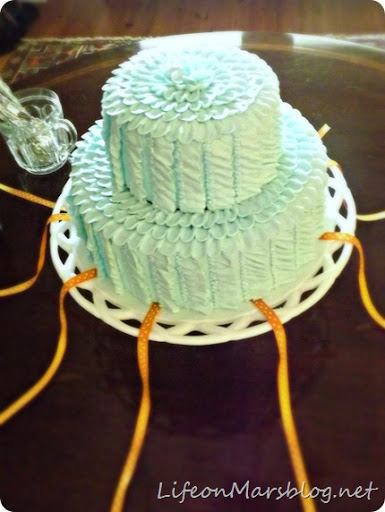
Instead of the traditional charms that are pulled out of the cake, each ribbon had a scripture written on it related to marriage. The scriptures were used to pray over the bride. I can’t believe I didn’t get a picture of the inside of this cake. About 6 thin layers of cake colored in blue and orange.
Other fun details:
Party Decorations
Amazing right? My mom worked herself to the bone, but I definitely think the bride appreciated it.
Party Decorations
The bride is second from the right on the front row. Isn’t she gorgeous? She’s an incredible woman and was a beautiful bride on Saturday. Congrats, Elizabeth!

Oh and don’t forget to enter the My Memories Suite Giveaway. it ends tomorrow night at midnight!

Giveaway: Thumbprint Designs Custom Artwork

First: thank you all for your sweet notes on my Master Bathroom Reveal yesterday.

Second: I officially can’t avoid it any longer… today is my 30th birthday. Let’s dissect this for a minute:

I have dreaded this day for at least 2 years. To me, it signifies the true end of my youth. As of yesterday, I was still in “my twenties” and was given some grace on stupid decisions. I mean, I realize that I’ve been paying my own bills, married, owned a house, cleaning that house (mostly), etc for quite a few years now… but at least I still felt young. I do not feel young today.

Third: I have a new favorite font and it’s called Scrap Casual. I will be implementing it a lot in the near future.

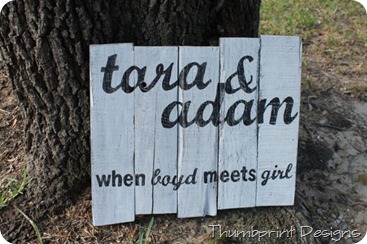
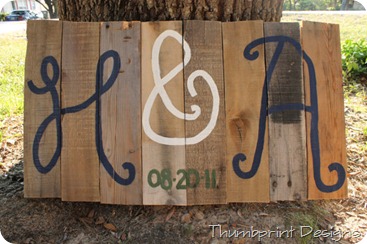
Fourth: In honor of today and to help cheer me up, my sweet friend, Skye from Neathering Our Fest (blog) and Thumbprint Designs (Etsy shop) has offered to host a giveaway for you. Now, I can actually call Skye my friend, because we were roomies at Haven. She’s wonderful and makes some AMAZING artwork. I love these wedding signs that she does:

il_570xN.286831738il_570xN.264596204
They can be completely customized… or I guess you could get someone else’s initials if that floats your boat.
I think this sign would make a super fun base for an autumn mantle:

il_570xN.286826324
So, here’s the deal. Skye is giving away a $40 credit to any sign in her store.

a Rafflecopter giveaway
There should be a Rafflecopter giveaway widget there. If there’s not (apparently it play well with readers or Internet Explorer sometimes), please leave me a comment and tell me which of the following entries you did:

  • Leave a blog post comment: tell me what you’d put on your sign.
  • Like Life on Mars on Facebook.
  • Heart Thumbprint Designs on Etsy.
  • Follow Life on Mars and Neathering Our Fest on GFC, RSS or email (one entry for each follow).

Good luck!

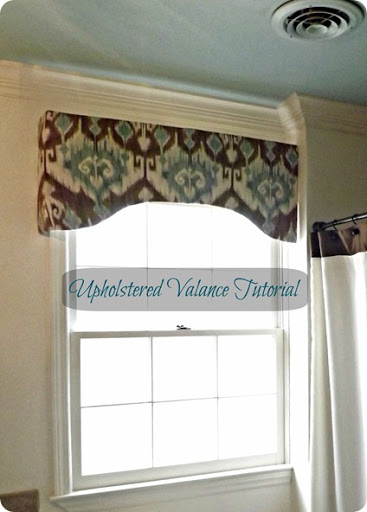
How to Make a Valance {Upholstered Valance Tutorial}

So the Valance has officially been hanging without issue for 3 days, so I’m gonna go ahead and give you the tutorial and if it falls again, then I’ll just have to revise it. But our latest solution seems to be working well, so I feel 100% 75% confident. What’s a DIY project without a little uncertainty?

How to Make a Valance
So I decided to go with an upholstered valance for a few reasons. (1) this window is directly over the toilet and full size curtains would gross me out. Let’s be honest, they boys splash sometimes. (2) It’s right next to the shower and I thought it would be too much with the shower curtain. (3) I still wanted a little something interesting to pull all the colors in here together.

I found this fabric on Fabric.com and loved it. It was a little bit of a splurge for me at $22/yd (I rarely pay more than $15) but I loved it, it fit kinda perfectly in here and I only needed about a yard, so that was still going to turn out pretty cheap.

Here’s what you need:

  • 1 yd of fabric
  • batting
  • 3 pieces 20×30 Foam Board, 1/2” thick
  • Duck Tape
  • Box Cutter
  • Spray Adhesive
  • Staple Gun
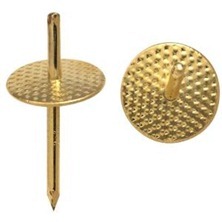
  • OOK Brass-Plated Steel 1-Step Hangers

NOTE: I used 3/16” foam board but that’s all I could find. It would have made this project MUCH easier if I’d had the 1/2”.

NOTE #2: I loosely followed the tutorial given HERE by Little Green Notebook, but I had to guess at a few steps which is why I’m giving you another one.

NOTE #3: This is a very detailed tutorial, but it’s a very easy project that took less than 2 hours start to finish, so don’t let the length of the unnecessarily wordy extremely informative tutorial scare you.

1. Measure your window. You’ll want your valance to be about 2-3” out from the window and 1-2” longer than the casing. The height it really up to you. Mine ended up being 40w x 16h x 3d.

2. Look around Pinterest and figure out what shape you want for your valance. There are a million options (here are two of my favorites: HERE and HERE that I loosely based this project on).

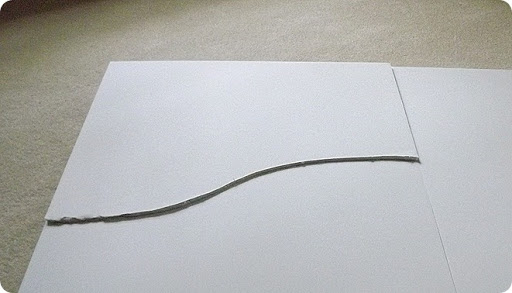
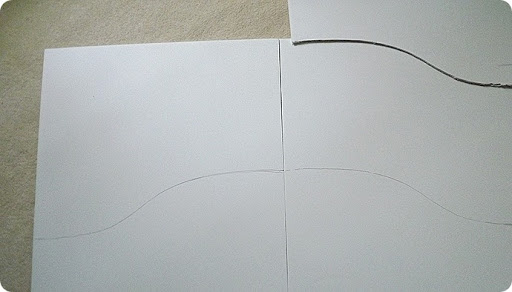
Use that picture to create a template out of one of the pieces of foam board. You only want to draw out half of the valance for the template:
How to Make a Valance
The piece on top is my template. Use that to draw your shape on to the other two pieces of foam board. This will give you mirror images.

Since my valance is 40” wide, the two pieces ended up being the exact width I needed. If you’re really good, you could probably skip this step and eyeball it.
How to Make a Valance
3. Use your box cutter to lightly trace along your lines. Don’t try to go all the way through the foam board on the first try or it’ll tear. Just try to score it on the first pass and then go a little deeper with each consecutive pass until you’re all the way through. It took me 3 passes on the 3/16” to get all the way through with a clean cut. It would take more if you’re using the 1/2”.

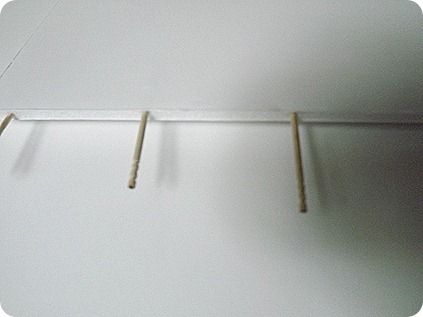
4. This is where I got a little creative.I wanted the center to have some support, so I grabbed some tooth picks and stuck them into the foam to connect the two pieces:
DSCF3545
Sorry, I realize that’s a terrible picture. The tooth picks just give it a little extra support so that it doesn’t bend in the center.

Then coat the center in duck tape. I used A LOT of duck tape to give it as much support as possible:
How to Make a Valance
5. Cut the side pieces to the depth you need. These should just be straight cuts. Duct tape those into place (see the left size of the above picture). I only needed 1 side piece, because my window butts into a wall on the right side, but you’ll probably need two.

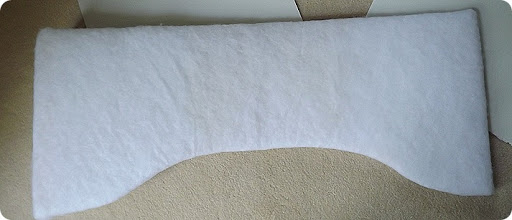
6. Lay the valance form face down on the batting and cut it to about 2” extra on each side. Make sure the batting is smooth. Spray the front-sideof the form with your adhesive spray (I used Elmer’s Adhesive Craft Glue) and stick it to the batting. Spray along the edges on the back of the valance, pull the batting tight and attach it to the back all the way around:

How to Make a Valance
I did two layers of batting, but that’s really up to you.

NOTE: If you are a professional upholsterer have any experience upholstering anything, please stop reading. I’m embarrassed for the rest of this tutorial.

7. Place your form on your fabric (front-side of the fabric should be down). If you have a pattern, be sure that your form is placed where you want it to get the full pattern and is level so that you’re not cutting at an angle across your fabric.

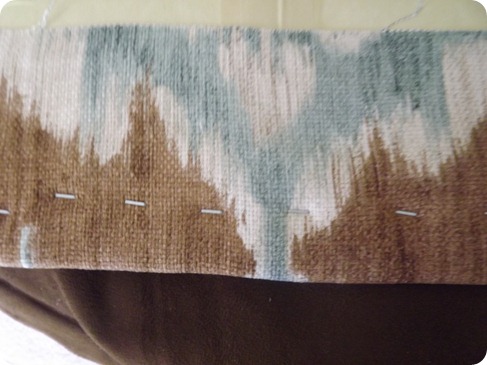
Cut your fabric to 2” wider than the valance form. Spray the front-side with the spray and attach it to the fabric (be sure that the fabric has no wrinkles).

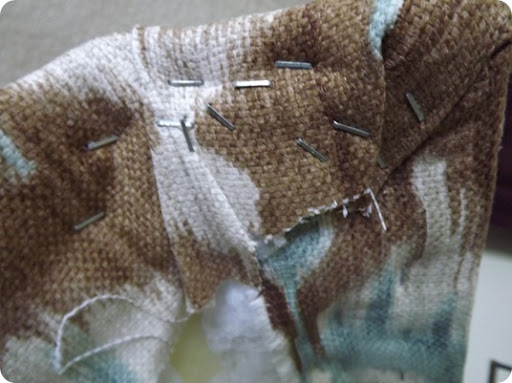
8. Pull the fabric tight around the back and staple into the foam board. This is where thicker foam board would have been great. A lot of my staples didn’t want to stick because the foam board was so thin.
How to Make a Valance
Staple all the way around and try not to do this:

How to Make a Valance
9. The valance is done. Pat yourself on the back, think about what a great job you did and hand it to your husband to hang. He will give you a weird look like “how the heck am I supposed to hang this? There are no hooks, no places for screws and no wood to attach to the wall.”

Hand him your handy dandy mounting tape which will definitely hold it. No problem! Then revisit this discussion in 3 days when the mounting tape does not hold and you find your valance sitting on the toilet.

10. Or Skip #9 and use these:
How to Make a Valance
They are OOK Brass-Plated Steel 1-Step Hangers. Punch the short end into your fabric (and into the foam if you can) and punch the other end into the wall. We used 3 on each side. It was a little more difficult than that, but you get the idea. It helps to make pilot holes in the wall so that you can push them in easily.

Stand back and admire your handiwork that would have been for nothing, if your husband hadn’t saved the day.
How to Make a Valance

How to Make a Valance
Total cost of this project was about $30 including fabric, batting, hangers and foam board.
I love it! Now if it’ll just stay in place…

Master Bathroom Makeover

So I kind of dropped off the face of the earth last week… I don’t even have a good excuse like I was super busy. I just didn’t really have anything to post about since I kept forgetting to take the pictures of the Master Bathroom. Then I didn’t really feel like making up something.

So today is the last day of my twenties… more on that tomorrow, but to cheer myself up I finally have the Master Bathroom reveal for you.

Bathroom Makeover
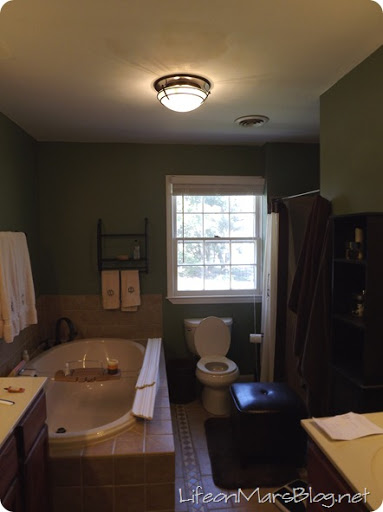
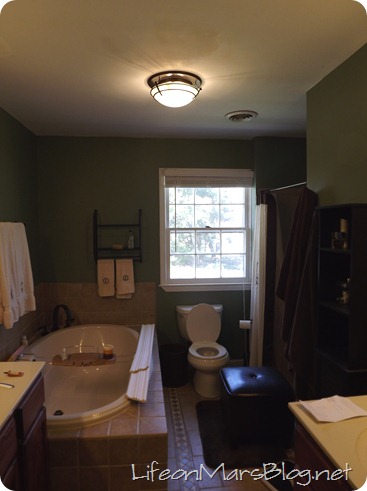
Here’s a trip down memory lane and what she used to look like…
Bathroom Makeover
I don’t know why there’s an ottoman in this picture. Your guess is as good as mine.

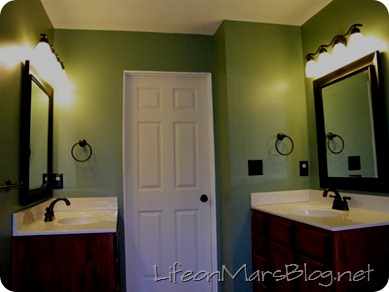
Anyway, before, the bathroom was dark, lacked serious privacy and I really hated the hunter green color and the lighting fixtures in here:

Bathroom MakeoverBathroom Makeover
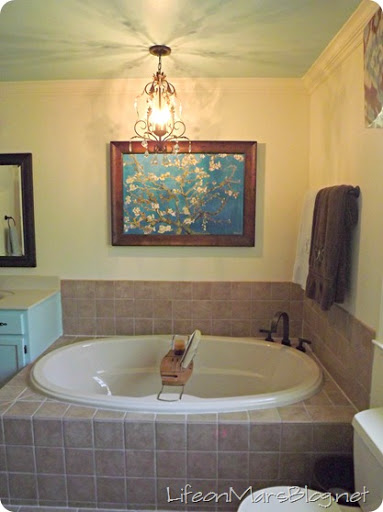
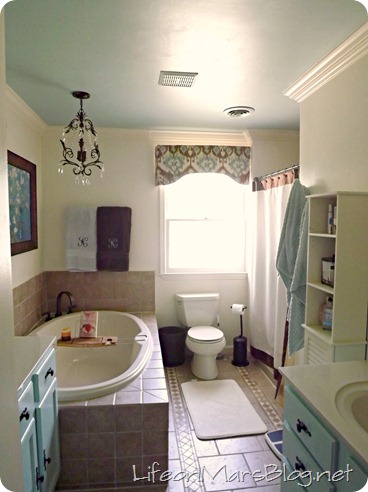
We bought the vanity lights at the Habitat Restore for $4.50 (and spray painted them) and purchased new globes on ebay for $7each. I think that was a huge improvement. We (and by we, I mean John) also moved the overhead light to over the tub and installed a chandelier.

Bathroom Makeover
Please note: I do not recommend putting in a chandelier over your tub since it’s not to code. When and if we sell this house in the future, we will probably have to change it. But oh, it does look so pretty.

I don’t know why the chandelier looks off center in this picture, but I promise, it’s not.

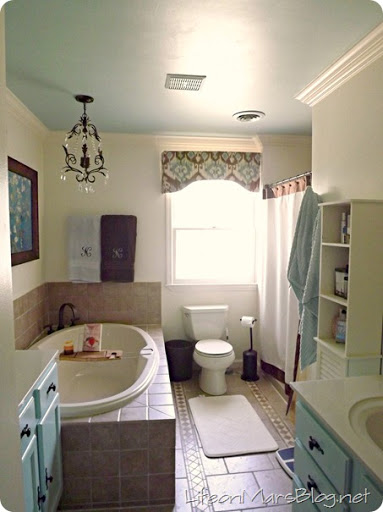
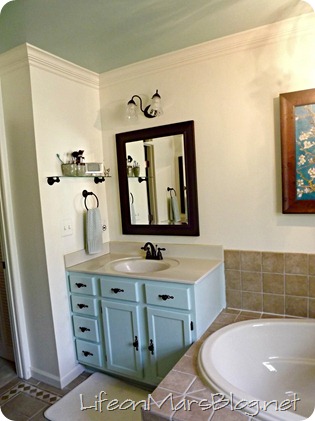
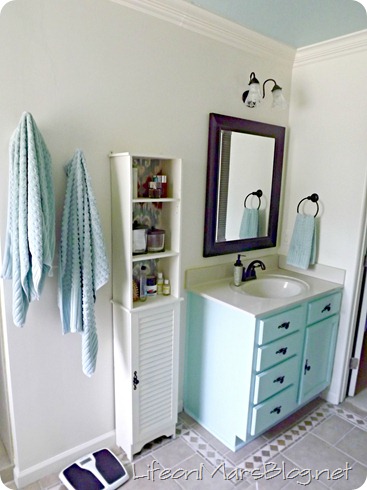
Obviously, we also painted the ceiling and vanities blue (Valspar’s La Fonda Mirage), painted the walls Benjamin Moore Linen White and added crown molding. I updated the tower with some spray paint and fabric behind the shelves:

Bathroom Makeover
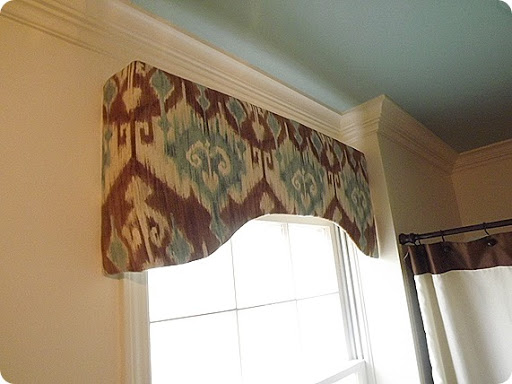
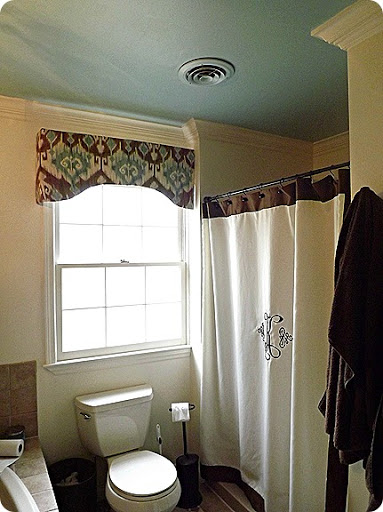
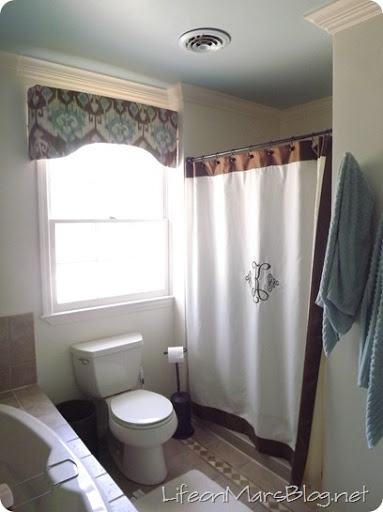
We also added privacy to the windows with Wallpaper for Windows and made a custom valance (for $30):

Bathroom Makeover

If you are dealing with flood and water damage, the water removal company will help you remove the water in your home.
Overall, I think it’s a pretty huge transformation:

Bathroom MakeoverBathroom Makeover
These pictures were taken around the same time of day (but I will say I’ve learned how to use my camera better so that helps a lot).

We also called a septic system service to check our septic tank for damage and to assess if pumping is needed.

What do you think? Come back tomorrow. I have a great giveaway in honor of my 2nd 29th birthday!

Kitchen Makeover with Ikea Butcher Block Countertops

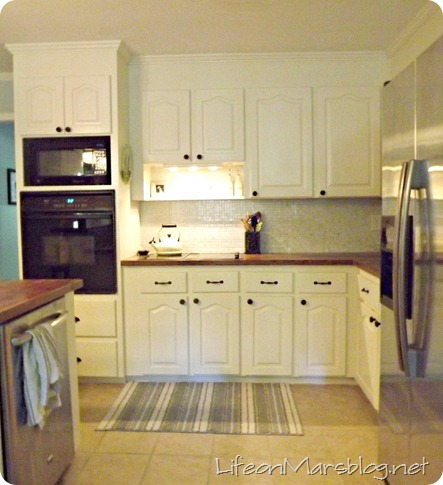
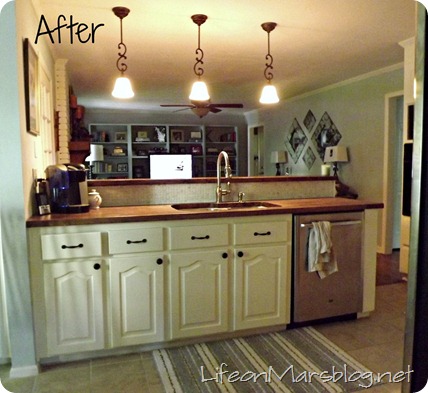
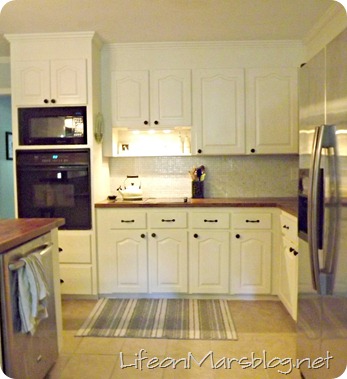
This may be the fastest makeover we’ve ever tackled. The Mudroom took about 6 months to complete all the projects, but from beginning to end (including a week for recovery from toe smashing), this one was 3 weeks. I’m pretty much in love with my new kitchen:

Kitchen Makeover
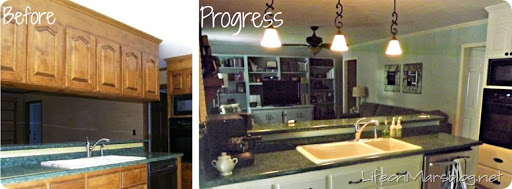
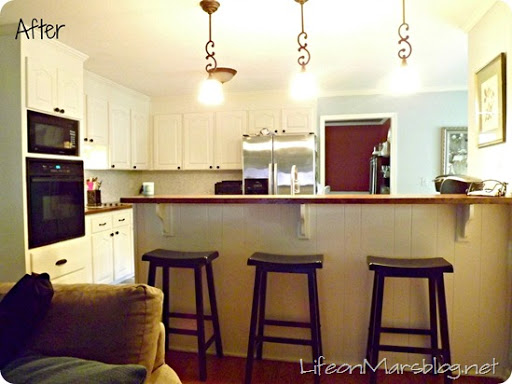
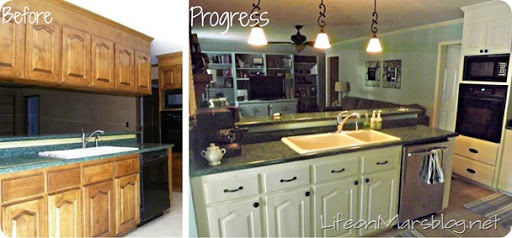
Let’s backtrack for a minute though. Here’s the progression of our kitchen over the past year and a half:

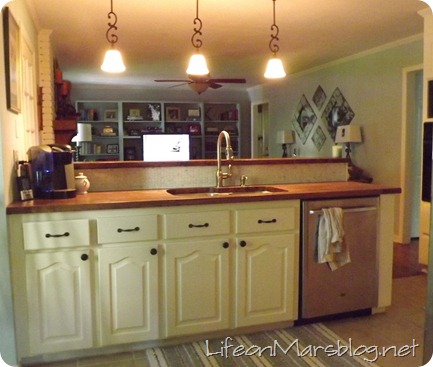
View from the Family Room:
Kitchen Makeover
Kitchen Makeover
The biggest difference here was early on. I think we removed those cabinets dividing the spaces on the 3rd day we lived in this house. It immediately opened up both rooms and made the rooms much more functional for entertaining.

On an unrelated side note, I think I might paint those stools a fun color? The black doesn’t really go anymore now that the countertops are wooden.

View towards the Family Room:
Kitchen Makeover
Kitchen Makeover

Ikea Butcherblock Countertops
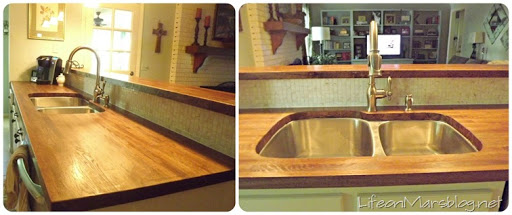
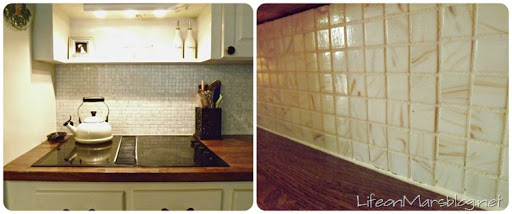
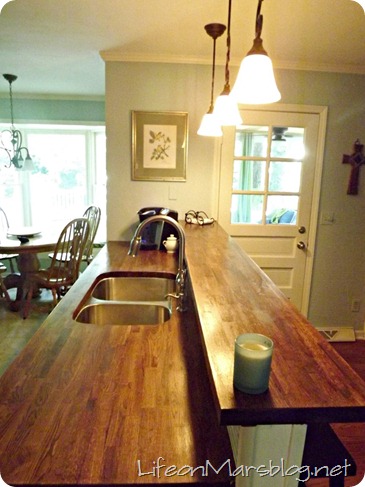
I have to brag on John (again!). He did ALL of the heavy work on this project. He cut all the boards, cut out the holes for the stove and sink (and that sink is super curvy), and he stained and sealed all the countertops. He did a much better job than I probably would have done. I love the color and the warmth the wood brings to the space. I did tackle all the tiling of the backsplash. I’ll talk about that in a later post (I had s secret weapon that made it SO MUCH EASIER). I love how the backsplash turned out. It just gives the right finished look to the kitchen.

Kitchen Makeover
We used Minwax Special Walnut stain (2 coats) and Waterlox for the seal (3 coats, top and bottom). There are some really great tutorials in the blogosphere that we used as guidance for these projects, but most of all we used the tutorial from This and That. It gave such detailed instructions for each step, that there’s really no reason for me to rehash it. Check it out if you are tackling this project!

We also installed a grease trap into our kitchen. Since we do not know how to install it, we hire a grease trap service.

Ikea Butcherblock Countertops
I’m so blessed to have a husband that is willing to put in so much work and effort into our home. I’m impressed by his skill and his determination and most of all, I’m thankful that he’s mine and is willing to make all these ideas into reality for me.

Kitchen hoods can be exposed to numerous dirt issues as a result of continuous cooking. However, you cannot just get any degreasing product and clean the kitchen hoods on your own. This is why it is important to hire a professional hood cleaning company.

Ikea Butcherblock CountertopsIkea Butcherblock Countertops

Now, I’ll admit that this was NOT our least expensive home project. It landed somewhere around $1000 after countertops, sink, faucet, backsplash and grout were included, but that’s still significantly better than the average kitchen remodel. What do you think?
Page 5 of 7