Mudroom Reveal {Laundry Room Makeover}

I know you are thinking one of two things…

  1. I can’t believe she’s actually finally posting this. She’s been talking about it FOREVER.
  2. What Mudroom? I don’t remember that project???

On both accounts, you’d be right. We started this little project back in March. Yep, that was 6 months ago (seriously, how is it September???). But between the Master Bathroom and now the kitchen, we got distracted. That’s why you should never tackle more than one room at a time. For the record, we are currently working on the kitchen, we purchased materials for the guest bath, made some updates in the family room and have started planning the nursery. Rules are made for breaking.

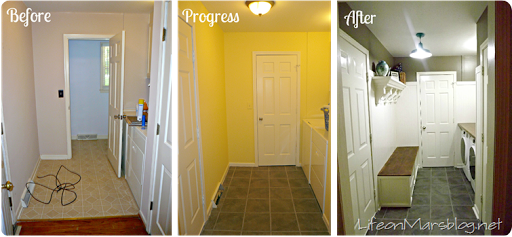
Anyway… back to the Mudroom/Laundry Room. Here she is:
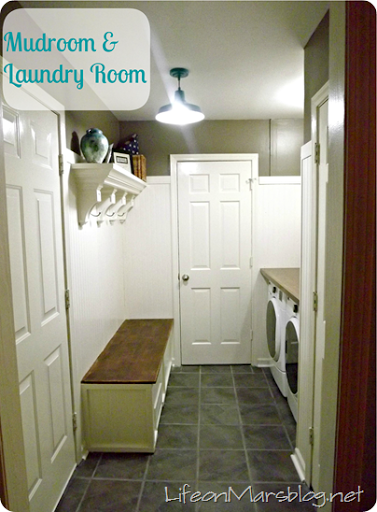
Laundry Room Makeover
Here’s the progression of this room:

Laundry Room Makeover
We started with a room that was half laminate and half wood flooring. Last year, we tiled and painted the walls, but I hated the color almost immediately. When the lights were on it, it was practically neon yellow.

This year, we:

  • added the bedboard 3/4th of the way up the walls:
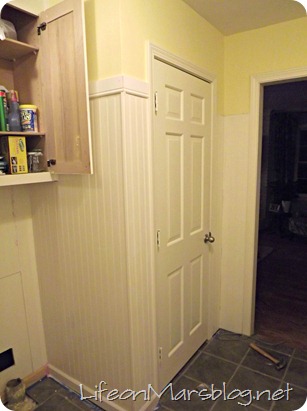
Laundry Room Makeover

  • Painted a greyish brown (I can’t remember the name, but I’ll try to find it and update this post)
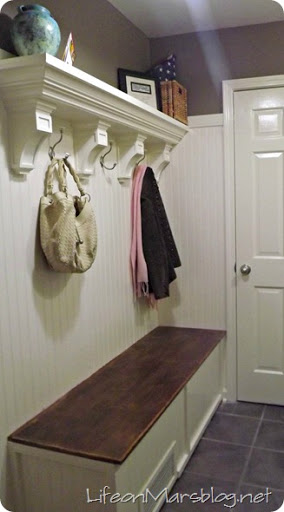
  • Added the bench and shelf

Laundry Room Makeover
OK seriously, this is where I need to take a minute to brag on my husband. He made both of these completely from scratch based only on a picture I provided from pinterest and then made adjustments based on my desire for corbels and a closed bench with internal storage (which is now my laundry sorter). The shelf is made from two pieces of wood, 5” crown molding and 4 corbels. It’s gorgeous. Here’s a close up:
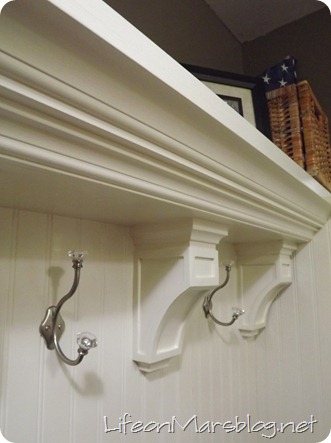
Laundry Room Makeover
How great is that? It looks like it could be one solid piece of wood instead of 7 separate pieces.
John actually mentioned to me that his projects seem to be getting more difficult each time I come up with something to do. But each time he impresses me so much that I have to see what else he can do, right?

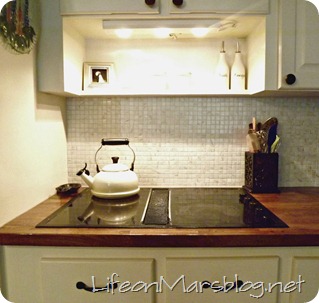
  • We added a piece of PureBond Hardwood Plywood over the washer and dryer to add a nice laundry shelf:
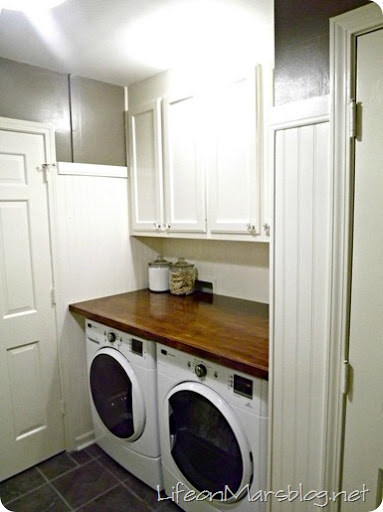
Laundry Room Makeover
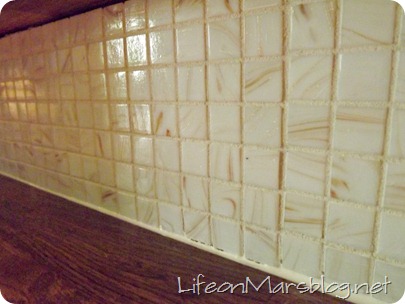
PureBond was perfect for this project. It’s actually plywood that has a veneer of solid wood on both sides, so it can be stained. It has a really nice finish with beautiful grain on the wood. Here it is in an unfinished stage:
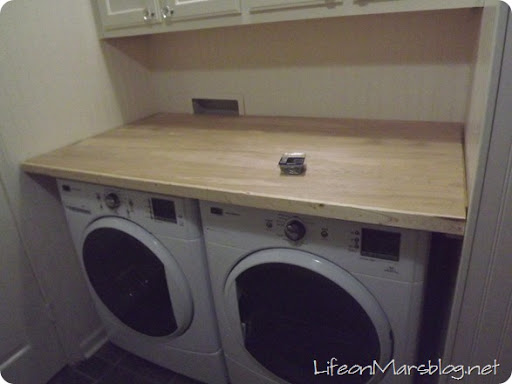
Laundry Room Makeover
PureBond can be used for any project that you would normally use plywood for or that you’d have to use a high end piece of hardwood if you’re planning on staining. It’s the best of both worlds. Plus it’s completely formaldehyde free and available through most Home Depot stores.If your HD doesn’t stock it, they can special order in almost any wood grain. I’d highly recommend it and will definitely use it again.

That’s it! Pretty big difference beginning to end, huh?
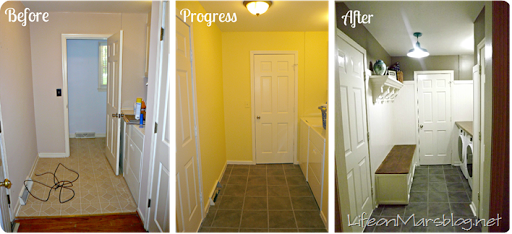
Laundry Room Makeover
What do you think?
Tutorial: Tile Backsplash Tutorial

GIVEAWAY: Don’t forget to enter the Royal Design Studio Stencil Giveaway!

How was your weekend? I spent the weekend celebrating with my future sister-in-law (just two more weeks!) and we were up in the North Carolina mountains. What a perfect way to bring in the fall! We had beautiful weather with crisp breezes and chilly evenings.
Tile Backsplash TutorialTile Backsplash Tutorial
A few weeks ago when I did my kitchen makeover, I promised to do a tutorial on the backsplash. This process was so much easier than I expected because of a secret weapon which I’ll share with you today.
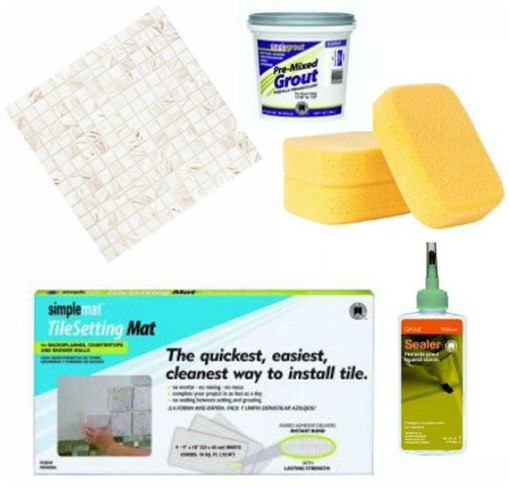
We bought our tile from Home Depot for $4.99/sq. ft. I always buy extra tile since you can take it back if you have leftovers. I bought 35 sq. ft but took back 7, so I ended up spending about $140 on the tile. Here’s what I used for this project:

Tile Backsplash Tutorial

  • Tile
  • Tile Setting Mat
  • Premixed Sanded Grout
  • Sponges
  • Grout Float (not pictured)
  • Grout Sealer

Tile Backsplash Tutorial
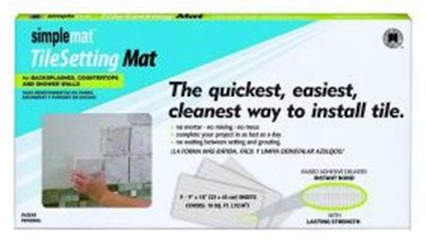
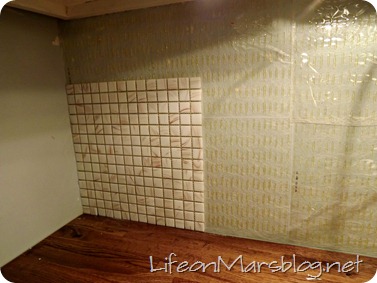
Here’s the secret: these tile setting mats (available at Home Depot) were pricey but worth every penny in my opinion. They are $20 for 10 sq. ft. and I managed to use just 2 boxes. I used 27 sq. ft in tile, so I’m pretty sure that it covers a little more than what the box says. These mats are essentially a sticker with two types of adhesive (one for the wall and one for the tile) and it completely replaces mortar.

BENEFITS: it’s quick, easy, and mess free. Mortar is hard to work with, messy and you have to be careful that it doesn’t start to dry before you get the tile up. The only negative in my opinion is that it’s more expensive than mortar.

NOTE: SimpleMat Tile Setting Mats are only approved for backsplashes, countertops and shower walls. Do not used on floors.

STEPS:

Tile Backsplash Tutorial
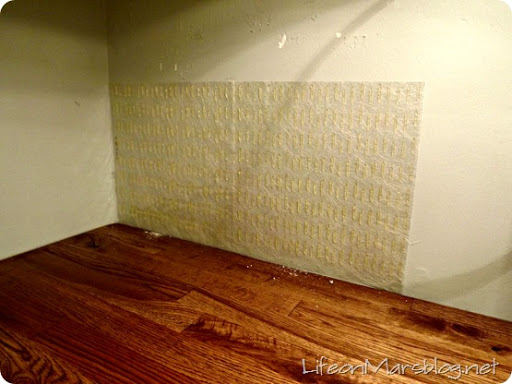
1. Peel off the white side of the tile setting mat (leave the clear side on until you are ready to place tile) and press to the wall.

Be VERY careful to place it exactly where you want it. It really doesn’t want to come off once it’s on the wall. It pulled my drywall off the couple of times that I did. Use the grout float to push out any air bubbles and make sure that it’s complete adhered.

Tile Backsplash Tutorial
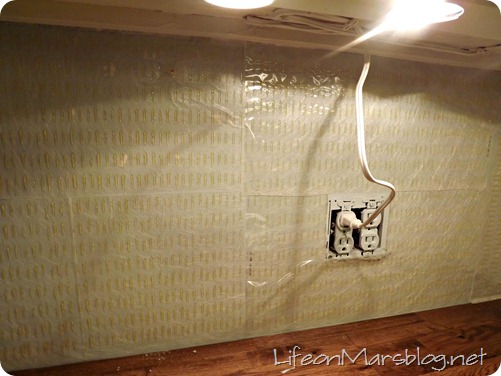
2. I put up all the adhesive before moving to tile. It will be fine as long as you leave all the clear plastic on the top. Be sure to cut out holes for outlets and any other things you might need to work around. The adhesive cuts VERY easily with a razor blade or sharp scissors between the rows of glue dots (you can see those in the picture above). Try not to cut through a dot. It wont mess up the adhesive, but it will mess up your scissors (they get very sticky).

TIP: Save your scraps because at the end I was able to use all the scraps to finish the last section so that I didn’t have to get an extra box.

Tile Backsplash TutorialTile Backsplash Tutorial
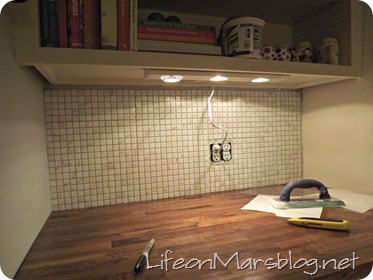
3. Add the tile. Pull off the clear plastic in sections and place tile against glue dots. Again, be very careful with your placement. This is a little more adjustable than the first step. Don’t push too hard on the tile until you are confident in the placement. Once you like it, push the tile into the glue.
If you are using mosaic tile on a mesh backing (like the above), just cut through the mess as needed with a razor blade. Super easy.

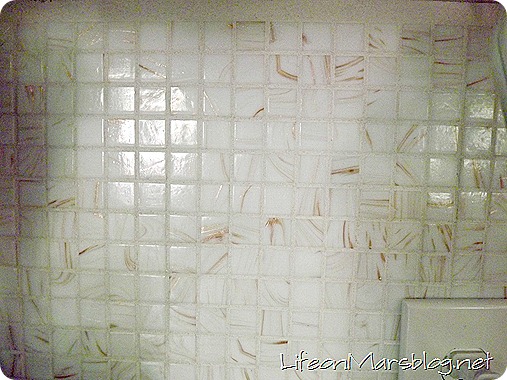
4. Here’s the beauty of the Tile Setting Mats: You don’t have to wait for mortar to dry before applying grout. I did it all in a single night. Use the premixed grout ($10/can) and the float to fill in the lines. You want to really push it into the cracks (which was a serious workout for my arm and shoulders).
You can mix your own grout if you want and save a few bucks, but again, I was more interested in speed, simplicity and mess on this project.

Note: You will use more grout than you think because there are so many cracks with mosaic tile. I used 5 cans of premixed grout.

5. Use a damp sponge to wipe down the grout. You want to make sure you get the sand off the tiles.

6. Let dry for at least 24 hours. Use a kitchen sponge with a scratchy side to clean tile. You want to get all the grout haze removed.

Tile Backsplash Tutorial
7. After grout has dried for 48 hours, apply the grout sealer. It’s pretty self-explanatory. The bottle has a brush, squeeze as you wipe over the grout. Let dry 30 minutes and apply a second coat. Wipe it down.
That’s it! Here’s the breakdown:

Adhesive: $40 and about 45 minutes for install
Tiles: $140 and about 1 hr for install
Grout: $50 and about 2-3 hours for install
Cleaning: $3 for sponges and about 1 hr
Sealing: $10 and about 30 minutes
Total: $243 and about 6 hours

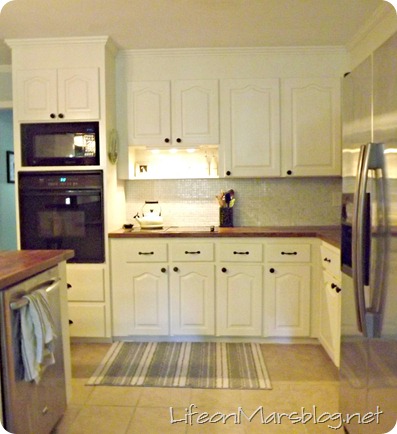
Simple, fairly quick and it makes a huge difference:
Tile Backsplash TutorialTile Backsplash Tutorial

We also got a grease trap installed by Houston grease trap.

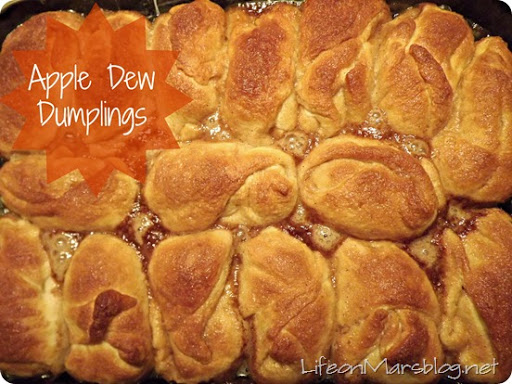
Recipe: Apple Dew Dumplings

Happy Thanksgiving week! I hope you have plans to share a big turkey with some wonderful people. We’re heading to my parent’s lake house tomorrow for a couple of days to celebrate the holiday.

If you’re looking for a last minute dessert idea, I’m here to help you out. Plus, this is one that the kids can help make as well.
Recipe: Apple Dew Dumplings
A friend introduced us to this recipe last year and we love it.

Ingredients

  • 1 Stick of Butter, melted
  • 1 Cup Sugar (did I mention it was healthy, too?)
  • 1 t. Cinnamon (or to taste)
  • 1 t. Vanilla
  • 2 Large Granny Smith Apples, peeled and cored
  • 6 oz Mountain Dew
  • 2 Cans Original Crescent Rolls (or Big N Flaky for fatter dumplings)

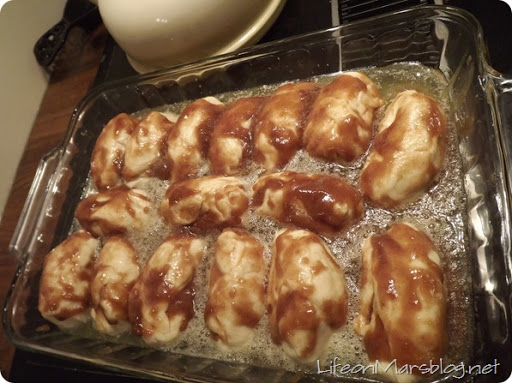
Mix melted butter with next 3 ingredients. Cut apples into eights. Roll each individual eighth into a crescent roll and place into a glass baking dish. Let them have a little room between them or they’ll be a little mushy on the bottom. The spoon butter mixture over each dumpling until empty. Pour mountain dew over the top.

Recipe: Apple Dew Dumplings

Yes, I know Mountain Dew is a weird ingredient. It’s delicious. Don’t worry.

Bake for about 25 min at 375 or until crescent rolls are done. Remove and let cool for 10 minutes. Serve with ice cream.

These are always a hit when I make them. Enjoy and Happy Thanksgiving!

Review: Dutch Boy Refresh Paint

I was given two gallons of paint by Dutch Boy to review their new Dutch Boy Refresh Paint. I knew immediately that I wanted to do the bathroom. Unfortunately, I was not immediately able to actually paint the space though… in fact, it too me over two months to get around to it. Let’s just use the preggo excuse here too… yep, I’m getting a lot of mileage out of that one.

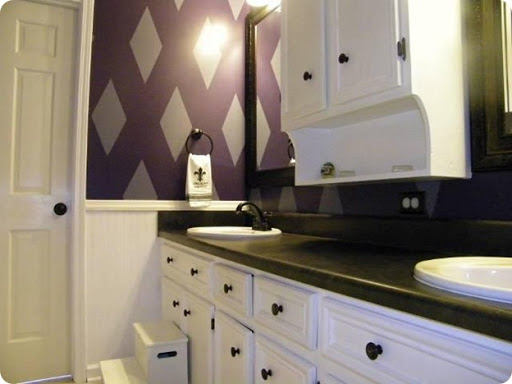
But, I finally did it and I showed you a sneak peak on Monday of the bathroom that went from this:

Dutch Boy Refresh Paint Review

Sorry, this is the best picture that I have that shows the horrible purple and grey diamond motif.
It was so abhorrent to me that I couldn’t bear taking real before pictures.

to this:
Dutch Boy Refresh Paint Review
I’ve been thinking long and hard about this review. It’s hard to review a product when most of the features are not yet noticeable. So I’m just going to run through the Key Features that the paint promises and talk about what I can.

Key Features

  • Exceptional Hide and Durability – The durability will have to be determined. I will try to remember to do an update post in about a year to let you know if it’s actually durable.

As far as the hide, I’m gonna have to call it like I see it on this one. Granted, I was covering dark purple paint with white, so you gotta give them a mulligan, but I did two coats of Zinsser primer before using the “self-priming” Refresh paint and I still had to do two full coats of white refresh paint. I was really hoping to get away with just one. After the first coat of pain, I could still see some purple coming through.

  • Gives mildew-resistant coating – I used it in the bathroom, so this’ll be included in the next update.
  • Zero VOC† / Greenguard® Indoor Air Quality Certified – Yay!!! loved this. There was essentially no odor and I was able to paint this room without using a mask. This isn’t just important for pregnant people, but for people with small children in their home.
  • Limited Lifetime Warranty
  • Reduces Household odors with Arm & Hammer odor eliminating technology

I’m counting on this one and again, I’ll update you in six months. I used this paint in both the nursery and the “baby’s bathroom” because this is where I’ll be washing out those cloth diapers that I’m planning on using. I think this feature is really cool though. Dutch Boy put Arm & Hammer in the actual paint, so odors in the room are supposed to be absorbed into the walls and trapped there.
image
So in my opinion, if this one feature of this paint works, then it’s worth using it in every bathroom, kitchen and nursery in the house (which I did use this in the nursery as well). I mean, let’s be real… nurseries have some very interesting odors going on.

So, all in all, it was a paint. The colors were true, which is a big thing for me,it applied easily and it had excellent coverage. For example, with one gallon of the Ultra white I covered:

  • 2 coats on the upper walls
  • 1 coat on the beadboard
  • 1 coat on the trim in bathroom and nursery
  • 2 coat on the window in the bathroom and the nursery
  • 1 coat on the cabinets

I really kept thinking that I was going to run out, so I was impressed when I finished and had a little leftover. But all in all, this is a paint that will need to be tested over time to really tell if it stands up to all of it’s promises.

Review: Frog Tape versus Scotch Blue

Happy Monday! Hope you all had a great weekend.

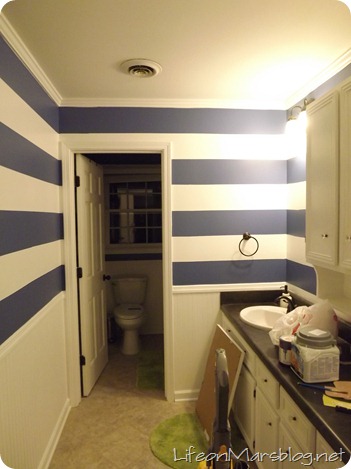
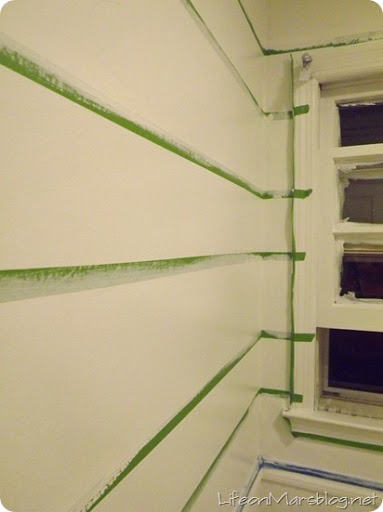
This is in no way a sponsored post for either Frog Tape or Scotch Blue. When I was putting the stripes up in the bathroom, I used A LOT of tape. If you’re interested in the actual tutorial, this is a good place to start: How to Paint Perfect Stripes on Wall by Centsational Girl It was very helpful to me and I may be prejudiced, but I think my stripes are pretty great:

Frog Tape versus Scotch Blue
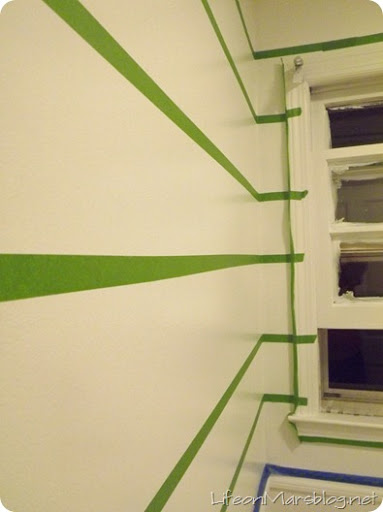
I will say that putting up the tape was a two person job. John held the laser level in place while I put up the tape along the line. Our laser level had a way to mount it, but it used pins and I didn’t want a billion little whole in my wall.

OK, so back to the Frog Tape versus Scotch Blue with Edge Lock. I used mostly Frog Tape because that’s what I had on hand, but I did use plenty of Scotch Blue to get a good idea of both.

Frog Tape versus Scotch Blue
In this particular picture, you only see a little of the Scotch Blue but there was a lot more used in other areas.

Putting up the tape: Scotch Blue wins this category hands down. In clung better on the first swipe than Frog Tape did. With Frog Tape, we found we needed to go over the tape multiple times before it really stuck, even then while I was painting it was peeling up in spots.

This is where the importance of “sealing the lines” comes in. Once your tape is up, cover the lines in your base coat color. That way, if there is any bleed, then the color that bleeds is the color that’s already painted, not the color that is your accent or stripe color.

Frog Tape versus Scotch Blue
Crisp Lines: I really couldn’t tell a difference between the two. Both had equally crisp lines as long as they didn’t pull off paint (see below).

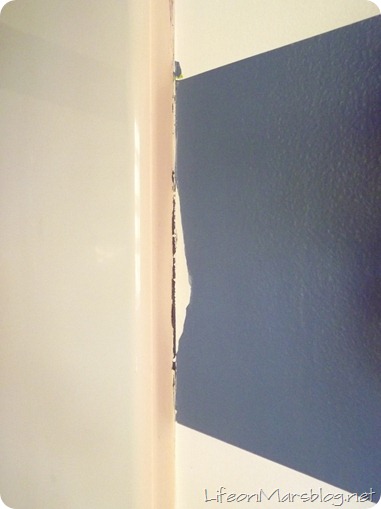
Removing the Tape: This is where Frog Tape won by a mile in my opinion. Frog Tape pulled off cleanly and required very little to no touch up afterwards. Scotch Blue not only pulled of TONS of paint, which makes for lots of touch-ups, but it also didn’t really want to come off at all. We had to use a knife and cut along the edge of the tape to help it come off. When you used about 700,000 feet of tape, this is not ideal. This is an example of the Scotch Blue removal process:

Frog Tape versus Scotch Blue
You can see some bleeding at the top, but that’s probably user error. The big problem is the HUGE patch of paint that peeled off along with the tape and that was after using the knife on the edge.

In John’s words: “This blue one really sucks. Don’t buy it again.”

I consider him a pretty impartial judge, so in our house, Frog Tape rules from here on out in spite of the issues of it initially not sticking. I guess we’d rather have it not stick enough than to stick too much?

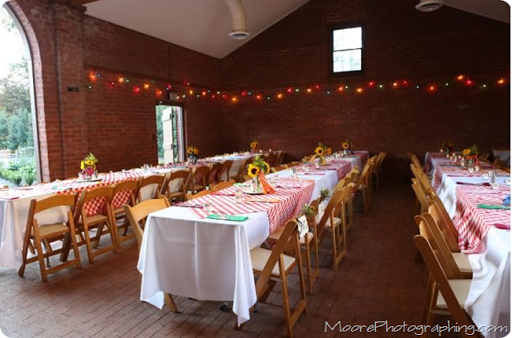
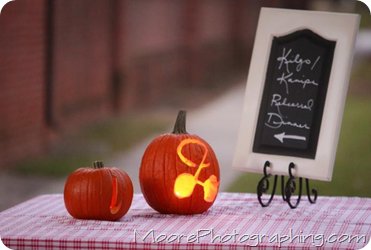
Rustic Fall Party {Rehearsal Dinner}

So remember how I spent the whole summer planning a rehearsal dinner for my brother-in-law and new sister-in-law? And remember how pretty it was and how great it turned out? Oh, you don’t remember anything about it? That’s because I didn’t take a SINGLE picture that night!!! #bloggerfail

Thankfully, Kathy Powell of Moore Photography came to my rescue in a big way. She is an incredibly talented photographer based in South Carolina and took better pictures that night than I could have ever attempted anyway. If you need a photographer in the southeast, everyone was so pleased with her. Super easy to work with.

Anyway, now I can show you how the actual party turned out!

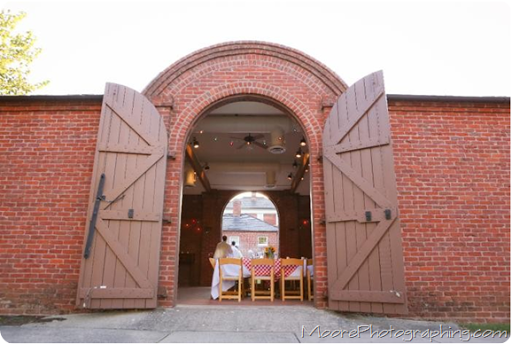
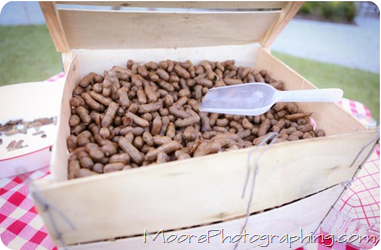
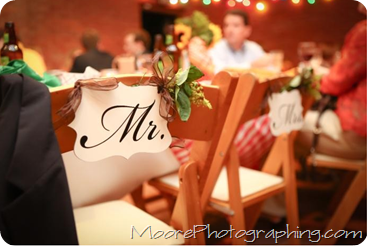
The dinner was held at an awesome historic carriage house in Columbia, South Carolina and it was the perfect fall night. I’m not going to jumble everything up with a lot of words, just know that great people + beautiful weather + boiled peanuts = good party. Smile
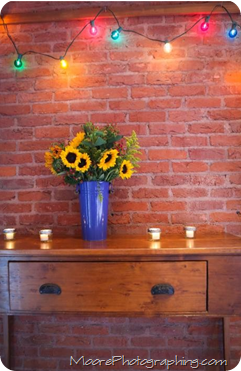
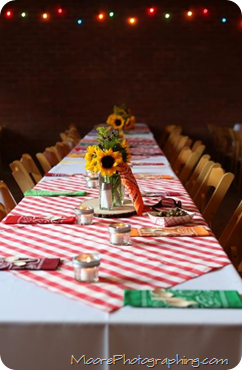
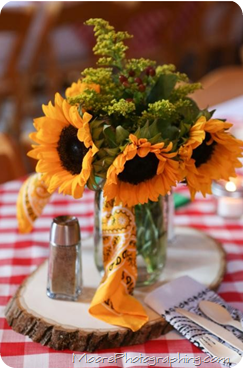
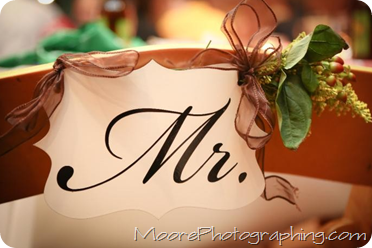
Rustic Fall PartyRustic Fall PartyRustic Fall PartyRustic Fall Party

Rustic Fall PartyRustic Fall PartyRustic Fall PartyRustic Fall PartyRustic Fall PartyRustic Fall PartyRustic Fall PartyRustic Fall Party

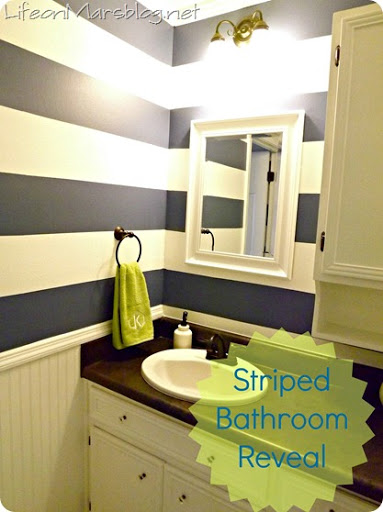
Striped Bathroom Reveal

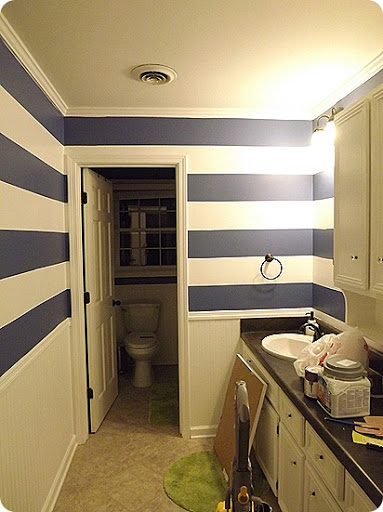
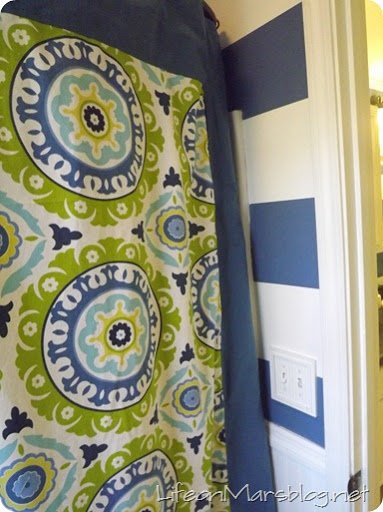
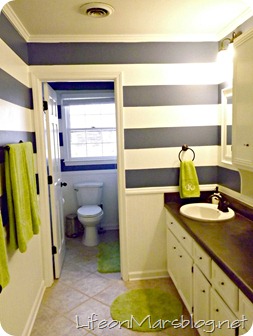
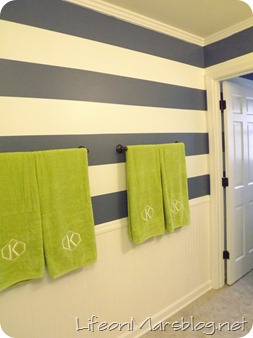
This room has been complete for two weeks, but I finally cleaned it and took pictures, which is always the step that takes me the longest. I LOVE how this bathroom turned out. It’s EXACTLY what I had pictures in my head from the stripes to the towels to the shower curtain. It’s great for future kiddos that will be the primary users but also works for adults when guests come and use it.

Bathroom Makeover
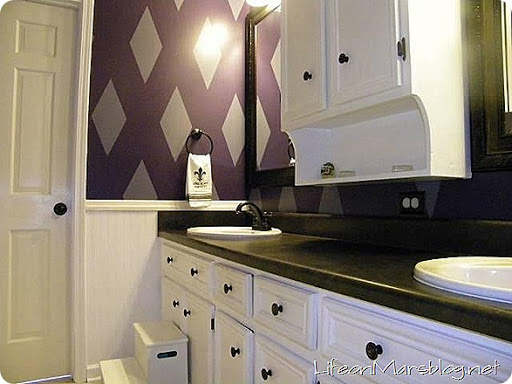
Let’s just remind you of where this bathroom started… It had really great bones. We didn’t need to change any fixtures and I liked the beadboard on the walls. But… I HATED the paint job…

Bathroom Makeover
So the biggest project in here was covering the purple paint with grey diamonds. More on that process HERE.

Bathroom MakeoverBathroom Makeover
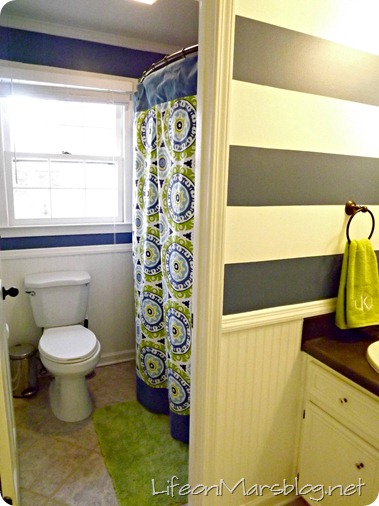
I made the shower curtain and I love it. I found the fabric on Fabric.com and knew that it was the inspiration for this bathroom.

Bathroom MakeoverBathroom MakeoverBathroom Makeover
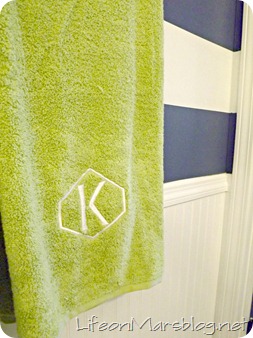
I found the fun towels and round bathmats at Target. The towels were only $4.99 each! That ended up evening itself out with the monogramming, so it was good that I got a good deal. I love the pop of lime against the blue.

This room just feels so much brighter and happier now.

Thankful…

Today I am thankful for so many gifts that the Lord has bestowed upon me. I am humbled by the incredibly blessed life that I lead. Here are just a few of those things:

1. The gift of salvation through the sacrifice of Jesus Christ on the Cross

2. My sweet husband. John, who is absolutely the world to me.

305
3. This little one… I can’t wait to meet you in just a few more months!

Sweet Face
4. My sweet family. So excited to spend some quality time with them this week.

5. My wonderful encouraging readers… that’s you! I truly consider each of you a friend and look forward to every email and comment you send me. Thank you!

I hope you all have a wonderful Thanksgiving full of family and friends and all the things you are thankful for.

Painted Fireplace

I hope everyone has had a wonderful Mother’s Day! I need to take a minute to brag on my Momma. She’s such an incredibly thoughtful woman. She’s been my example, my best friend, advisor and support system for as long as I can remember. Throughout this entire moving process, she’s been alongside for the fun parts (house shopping) and the really not fun parts (packing and painting).

This past week, she’s gone so far above and beyond a role as a mother and a friend. She came over almost every day and helped with something. She brought us food. She helped paint… and the list goes on and on. Most importantly, she was a huge encouragement when I was frustrated or feeling like things were moving WAY more slowly than they should be. Which, let’s be honest, they were… but she helped me look past it and move forward.

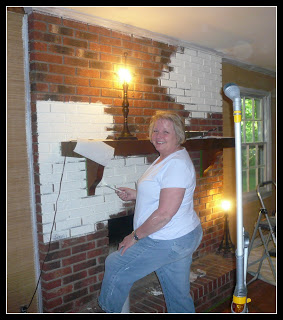
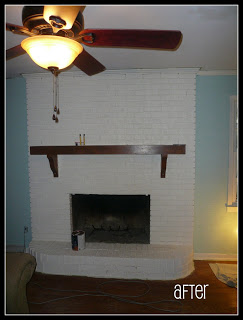
Together, we conquered a big project that would have taken hours to do by myself. There was actually a lot of debate on this project as well. Apparently, my house causes a lot of that… the sectional, the fireplace, the cabinets, the desk. I’m sure I’ll tell you about each of those projects in time. Right now, it’s the fireplace. To paint or not to paint? We had a lot of votes for both sides. Apparently, people feel very strongly on this issue one way or the other. The debate was settled while I was painting the trim. I got a lot of it on the brick, so it was pretty much decided.

We’ve only done one coat so far, so it’s not officially complete. I’ll show you pictures again once I get it complete and decorated. However, I wanted to brag on Mom, I wanted to show you and DecorChick! is hosting a link party tomorrow. I really wanted to have something to contribute. Here it is:

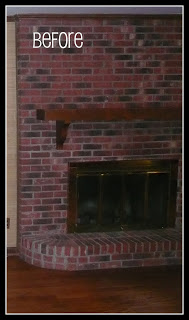
I forgot to take a really good before picture of the fireplace before.
My incredible mother!
So after all that debate, I love it! It’s so much brighter. I also need to give a huge shout out to my husband who painstakingly installed our beautiful new fan. We desperately needed it in there. Since the fireplace makeover only took 2 gallons of Valspar Signature Paint in Linen White (which is also the color of all the trim). So our fabuless fireplace makeover cost $60. Not bad for huge impact, huh?
Happy Mothers Day to my wonderful Mother and too all the other mothers out there!
Page 6 of 7