Brighten and Lighten – The Transformation!

So you’re going to get 10 for the price of one today. We’ve finally finished up the kitchen, so I get to show you where ALL (and I do mean all) our time has gone over the past few weeks. I’ll walk you through some of those projects tomorrow, but for now, just the fun before and after pictures. 🙂

I’ve been talking a lot about brightening up both the kitchen and the family room. Both spaces were so dark, even in the middle of the day. So I’ve been using all the tools in my arsenal (and stealing a few from other people’s as well) to brighten up both spaces.

I’ve added some serious lighting fixtures:

Check out my $12 lamp from TJ Maxx! Gotta love that store. The fixture had broken off, but a little super glue and 30 seconds took care of that. I knew that linen-like shade would look good against the grass cloth.


So I spent the $$$ that I saved from the other lamp on a GORGEOUS floor lamp from Bassett. Now to be fair, I did get it at 30% off when I bought the couch, but it’s still not an especially good deal. However, I loved it, it’s perfect for the spot and totally worth every penny.
Finally, the biggest change in lighting has to be the pendant lights that my sweet Daddy spent HOURS on. Here’s a reminder of what the kitchen looked like from the living room before:


Then we took down the cabinets and it became this:

Then, after painting the cabinets and removing the popcorn (still not over that little surprise), Daddy and John had to wire the space for lights (which basically meant ripping multiple holes in the wall). Then they put up the pendants, but they were took long and would hang in the way. So my Dad bought a tap-and-die kit to cut the poles down and then re-thread the inside (why that’s called tap-and-die, I really have no idea). Not an easy or quick process. Still, it makes such a HUGE difference:

Here’s another view…


We ‘ll talk about that process of painting the cabinets at another time. Let’s just say IT WAS NOT FUN. Replacing that hideous fluorescent light was a good decision, which some people advised against.  The “new” fixture came from the family room where we hung the new ceiling fan… so it was FREE! Not too shabby.
We also got a grease trap installed by a grease trap service.
Now, I know this has been a long post, but there have been so many projects in this space that it’s just going to take a bit of time…
I really need to brag on my wonderful husband for a minute. We had this weird desk in the corner of the kitchen.
It seems to be a 80’s thing because a lot of houses from this time period have them. However, it’s very strangely positioned and I’d never use it. But we didn’t know what to do with that space. We threw around a bunch of different ideas, but John came up with the idea to make it an area for my baking supplies. So he raised the desk to counter height (about 6″), added a new outlet, and cut out two of the old cabinets from the divider:
and put them under the old desk.
Seriously, how cute is he and how great do my new cabinets look?
 Now, I know I make that sound like a simple process, but it wasn’t.  He had to cut them off of the original structure and build a box for them to sit on… he did a lot to make this work for me.
When all was said and done, I now have a perfectly sized baking center under all my cookbooks. I LOVE IT! It’s really one of my favorite things about the kitchen (along with the pendants… I do love those pendants).
I still have to add the cabinet hardware and touch them up, but overall, I’m happy to be in a functional kitchen again. What do you think of the kitchen transformation?

Don’t Ever Paint Your Cabinets

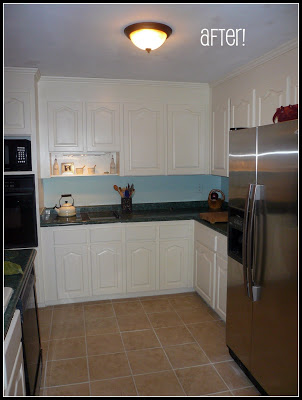
Let’s start with a little advice. If you get it into your head, like I did, that you want to paint your cabinets, here are a few tips:

  1. Don’t do it.
  2. See #1
Seriously, I’m not playing around… if there is any other option that is left unexplored, then explore it before you paint your cabinets. However, if painting your cabinets is your lifelong dream, then who am I to stand in the way? Maybe my experience will help you not make the same mistakes.
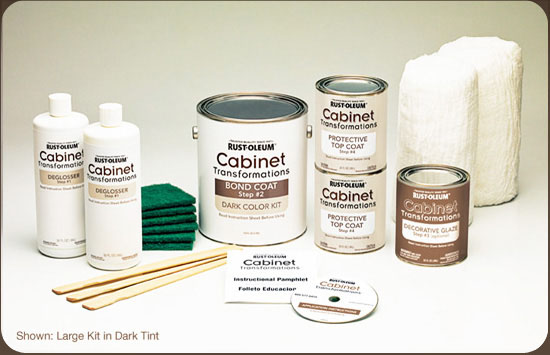
I saw a commercial and a few good reviews of Rustoleum’s Cabinet Transformations kits. It boasts no sanding, no stripping and no priming. Plus, it comes will everything you need, so mid-way through my project I wouldn’t have to make another trip to Lowe’s.
My lazy self thought “oh perfect! a simple solution!” HA! My mother always calls me “a marketer’s dream,” which let’s face it… I am. I’m a sucker for an infomercial.

I proceed to measure my cabinets and based on the online tool, I estimated that I needed one 1 large kit and 1 small kit. In fact, that ended up being way too much. I didn’t even open the small kit and of course, they are non-refundable, so there’s $80 bucks wasted. Of course, I could still use it to refinish something else in my house. I probably will at some point when I forget what a horrible experience this was.

If I were to start the whole thing over, I would go with the way Stacy did it on her blog Not Just a Housewife. Unfortunately, I read her blog about 5 days after starting my process. 🙁 She spray painted the whole thing and it looks amazing. Follow her lead, not mine.

Step #1: Deglossing
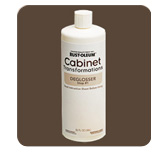
This step is supposed to prepare the surface by cleaning and roughing it up a bit.

Tip #1: wear gloves!

Tip #2: Don’t let your gloves get holes in them.
Tip #3: Don’t plan to workout on the day you do this. This will tone your arms faster than any machine could.
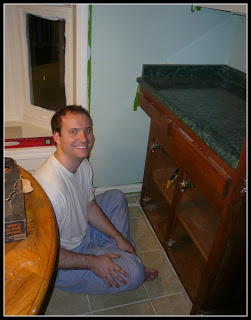
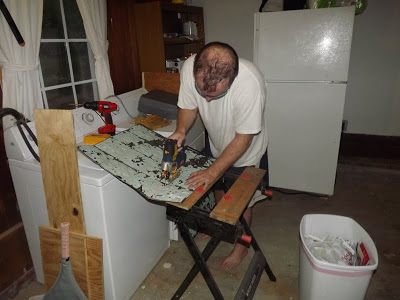
Here’s me while deglossing:


But this is how I really felt:
All in all, this step took me about 4 hours over the coarse of two evenings.
Step #2: Bond Coat

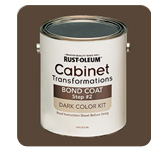
The bond coat is a creative name for the special type of paint that bonds to the surface that your painting. It is also tinted to one of the many color options from the box. I had read in my reviews that you could actually have them tint it any color, but Lowe’s wouldn’t do that for me.

Tip #1: Paint 2 coats on the backs of cabinets and then 2 coast on the front, instead of flipping them over between each coat.
Tip #2: Use brush strokes in the direction of the wood grain. See page 9 in this users guide: Rustoleum Cabinet Transformations Instructions
This step takes a long time. They suggest 2-3 hours to dry between each coat. Since I was doing this after work, that means I could only do one coat per day. Plus, you have to do 2 coats on the fronts and 2 coast on the backs of the doors, which is technically 4 days.
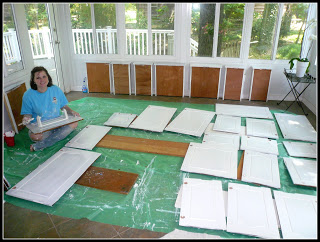
So many doors…
Step #3: Repainting
I painted all the trim in the family room and living room Benjamin Moore’s Linen White. So i choose the Linen cabinet color, figure it would be close enough. It wasn’t. Therefore:
After two coats of bond coat, I did a third coat of my linen white so that it matched my trim and everything else. Rustoleum definitely does not recommend this and I may not have as long of lasting results because of it. I’ll let you know in a couple of years.
This step took two days since I did a coat on the backs and a coat on the fronts and let them dry for 2-4 hours between.
#4: Protective Coat
This is where I really met with issues. This stuff is like water it’s so thin. It drips everywhere. Rustoleum suggests painting the backs and then the fronts, which is what I did. If I could do it over, I would do the protective coat on the backs, then hang the doors and then do the protective coat on the fronts.
This step took another 2 days. In the end, it took me 10 days of actual work, but I wasn’t able to paint for 10 days in a row, so it was really like 13 beginning to end.
Pros:
  • I love the finished look.
  • The kit actually did have everything I needed other than paintbrushes.
Cons:
  • Not everyone has the perfect set-up for a major project like this. They want the doors laid on in a non-ventilated, sun-less, dust-free space. I don’t have any rooms that fit that description… my garage was currently storage for boxes and covered in dust from sawing, so Plan B was the unfurnished sunroom. A sunroom is (as the name implies) not sun-less, but it was the closest I had. Very few people have a space like what they are asking for. It’s probably why I have dust on my finished doors and now have to do touch-ups to cover it up.
  • They advertise this as a weekend project, but it’s definitely not because of how many coats must go on the doors with 2 hours in between. I have this weird habit of sleeping at nights (even on the weekends).
  • The protective coat is very difficult to work with. It goes on cloudy but dries clear. However, if you allow a drip to dry on the surface, then the drip is slightly yellowish and not clear.

We also got a grease trap in the kitchen installed by Phoenix grease trap.

This was a little bit of a bummer of a blog. So I’ll end on the oh-so-happy note that I’m going on vacation tomorrow!!!

Ceiling Tile Mirrors

I’m so excited about the craft that I get to show you today! I almost wrote this blog last night but we had someone coming to look at the washer/dryer that we posted on CraigsList. He bought them! So excited to get rid of them and have an extra $200 for more decorating in the bank.

I was completely stumped by what to put on this HUGE wall behind my sectional. Everything that I looked at was dwarfed by the size of this wall.

It definitely needed something. Well, remember this awesome piece of ceiling tile that I purchased at the Tobacco Barn on my shopping trip? It was regularly $120 but it was on sale for $40. It came out of an old warehouse that burned down and it was still covered in soot.

I originally considered hanging it as is, but it just looked a little frumpy up there, but it was almost the right size. Plus, I still really wanted some kind of mirror to go up there to reflect back the light from the windows. So, I had my sweet husband cut them into two squares and cut the centers out.

Here’s what they looked like after:


Plus, I just so happened to have some extra mirrors sitting around. They came out of the guest bathroom when the previous owners updated it. They were simple builders grade mirrors. I took them to the glass cutters and for $10 had two 18×18 mirrors. Perfect!

We hung them on the wall with a mirror hanging kit that we picked up from Home Depot for $5.

After we hung the mirrors, we hung the frames around them with simple nails.


That’s it! Two custom mirrors that measure 24×24 each for $55 total.


I love the way the metal has different shades to it from age. The bronze part really picks up the color from the sofa.


 Now, I have these two extra pieces of tile that came out of the center.


I thought about hanging them on either side of the mirrors, but it looked a little TOO symmetrical, ya know? I’ve also thought about hanging them somewhere else in the room as simple wall art. What do you think?

1 5 6 7
Page 7 of 7