So the Valance has officially been hanging without issue for 3 days, so I’m gonna go ahead and give you the tutorial and if it falls again, then I’ll just have to revise it. But our latest solution seems to be working well, so I feel 100% 75% confident. What’s a DIY project without a little uncertainty?
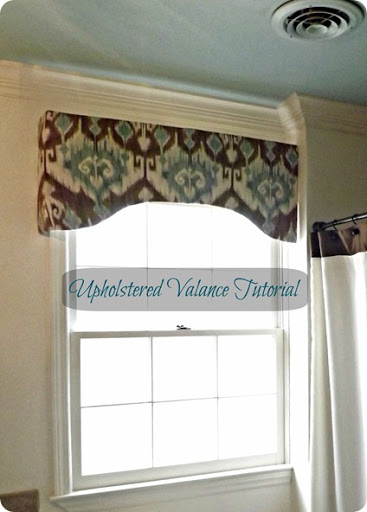
So I decided to go with an upholstered valance for a few reasons. (1) this window is directly over the toilet and full size curtains would gross me out. Let’s be honest, they boys splash sometimes. (2) It’s right next to the shower and I thought it would be too much with the shower curtain. (3) I still wanted a little something interesting to pull all the colors in here together.
I found this fabric on Fabric.com and loved it. It was a little bit of a splurge for me at $22/yd (I rarely pay more than $15) but I loved it, it fit kinda perfectly in here and I only needed about a yard, so that was still going to turn out pretty cheap.
Here’s what you need:
- 1 yd of fabric
- batting
- 3 pieces 20×30 Foam Board, 1/2” thick
- Duck Tape
- Box Cutter
- Spray Adhesive
- Staple Gun
- OOK Brass-Plated Steel 1-Step Hangers
NOTE: I used 3/16” foam board but that’s all I could find. It would have made this project MUCH easier if I’d had the 1/2”.
NOTE #2: I loosely followed the tutorial given HERE by Little Green Notebook, but I had to guess at a few steps which is why I’m giving you another one.
NOTE #3: This is a very detailed tutorial, but it’s a very easy project that took less than 2 hours start to finish, so don’t let the length of the unnecessarily wordy extremely informative tutorial scare you.
1. Measure your window. You’ll want your valance to be about 2-3” out from the window and 1-2” longer than the casing. The height it really up to you. Mine ended up being 40w x 16h x 3d.
2. Look around Pinterest and figure out what shape you want for your valance. There are a million options (here are two of my favorites: HERE and HERE that I loosely based this project on).
Use that picture to create a template out of one of the pieces of foam board. You only want to draw out half of the valance for the template:
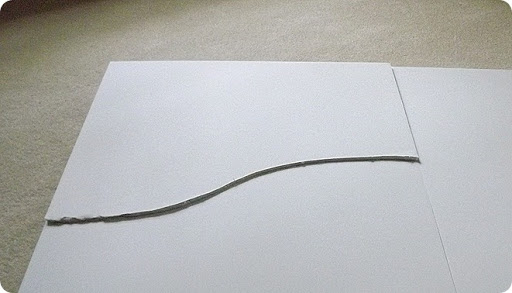
The piece on top is my template. Use that to draw your shape on to the other two pieces of foam board. This will give you mirror images.
Since my valance is 40” wide, the two pieces ended up being the exact width I needed. If you’re really good, you could probably skip this step and eyeball it.
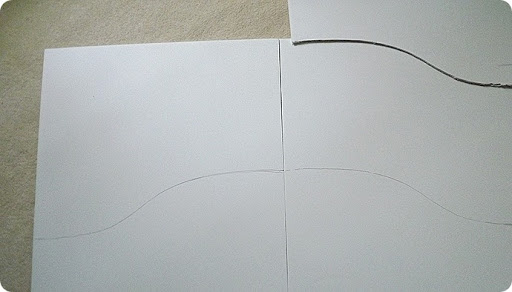
3. Use your box cutter to lightly trace along your lines. Don’t try to go all the way through the foam board on the first try or it’ll tear. Just try to score it on the first pass and then go a little deeper with each consecutive pass until you’re all the way through. It took me 3 passes on the 3/16” to get all the way through with a clean cut. It would take more if you’re using the 1/2”.
4. This is where I got a little creative.I wanted the center to have some support, so I grabbed some tooth picks and stuck them into the foam to connect the two pieces:
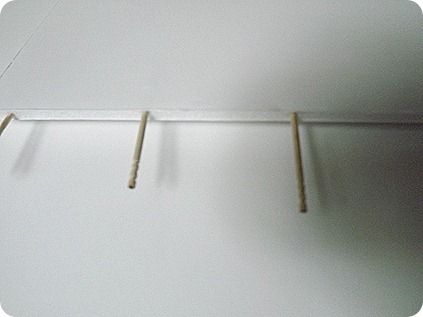
Sorry, I realize that’s a terrible picture. The tooth picks just give it a little extra support so that it doesn’t bend in the center.
Then coat the center in duck tape. I used A LOT of duck tape to give it as much support as possible:
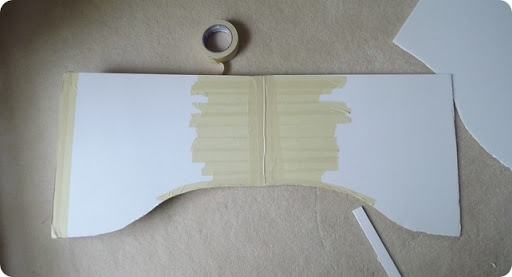
5. Cut the side pieces to the depth you need. These should just be straight cuts. Duct tape those into place (see the left size of the above picture). I only needed 1 side piece, because my window butts into a wall on the right side, but you’ll probably need two.
6. Lay the valance form face down on the batting and cut it to about 2” extra on each side. Make sure the batting is smooth. Spray the front-sideof the form with your adhesive spray (I used Elmer’s Adhesive Craft Glue) and stick it to the batting. Spray along the edges on the back of the valance, pull the batting tight and attach it to the back all the way around:
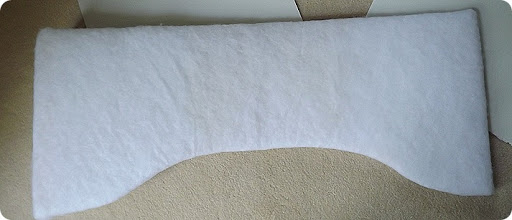
I did two layers of batting, but that’s really up to you.
NOTE: If you are a professional upholsterer have any experience upholstering anything, please stop reading. I’m embarrassed for the rest of this tutorial.
7. Place your form on your fabric (front-side of the fabric should be down). If you have a pattern, be sure that your form is placed where you want it to get the full pattern and is level so that you’re not cutting at an angle across your fabric.
Cut your fabric to 2” wider than the valance form. Spray the front-side with the spray and attach it to the fabric (be sure that the fabric has no wrinkles).
8. Pull the fabric tight around the back and staple into the foam board. This is where thicker foam board would have been great. A lot of my staples didn’t want to stick because the foam board was so thin.
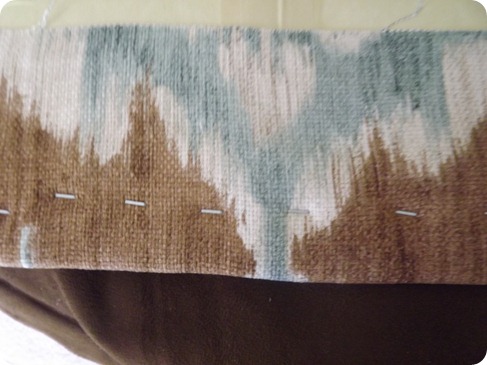
Staple all the way around and try not to do this:
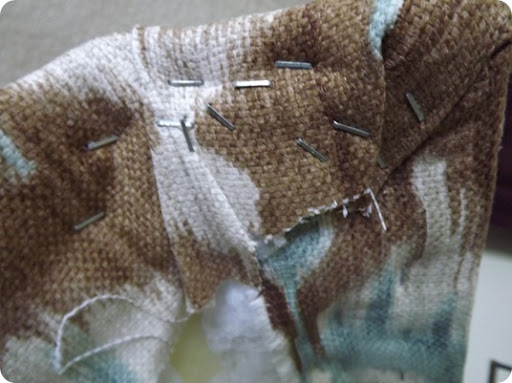
9. The valance is done. Pat yourself on the back, think about what a great job you did and hand it to your husband to hang. He will give you a weird look like “how the heck am I supposed to hang this? There are no hooks, no places for screws and no wood to attach to the wall.”
Hand him your handy dandy mounting tape which will definitely hold it. No problem! Then revisit this discussion in 3 days when the mounting tape does not hold and you find your valance sitting on the toilet.
10. Or Skip #9 and use these:
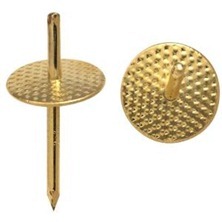
They are OOK Brass-Plated Steel 1-Step Hangers. Punch the short end into your fabric (and into the foam if you can) and punch the other end into the wall. We used 3 on each side. It was a little more difficult than that, but you get the idea. It helps to make pilot holes in the wall so that you can push them in easily.
Stand back and admire your handiwork that would have been for nothing, if your husband hadn’t saved the day.
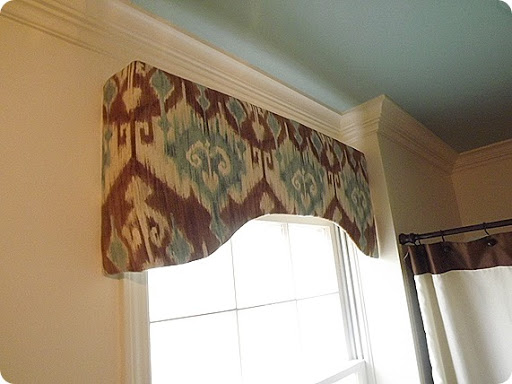
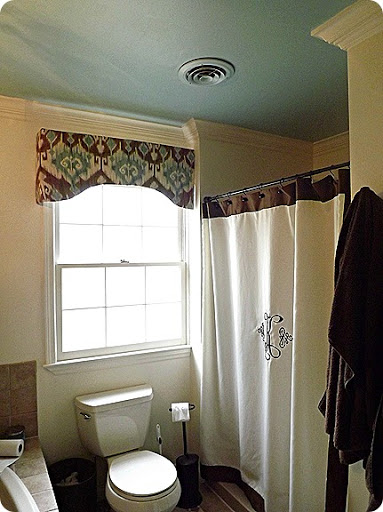
Total cost of this project was about $30 including fabric, batting, hangers and foam board.
I love it! Now if it’ll just stay in place…
