Our Christmas Tour

I can’t believe how late I’m posting this! I’ve head our Christmas decorations up since the end of November, but I haven’t had time to post about them. I know by now you are all a little over seeing everyone’s Christmas decorations, but you’re getting it anyway. So get ready for a photo-filled post.

Family Room

Christmas Decorations
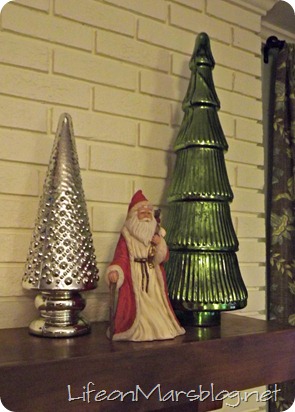
I’ve become very sentimental about my Christmas decorations. Many of them have a deeper meaning to me. The wreath is just like one that my Mom has hung at our house for years and I’ve always loved it.
Christmas Decorations
Plus we made mine together last year. The Santa is part of my Dad’s collection that he’s had for a long time and last year, he gave this one to me. Each is handmade and hand-painted. They are all truly beautiful.

Christmas Decorations
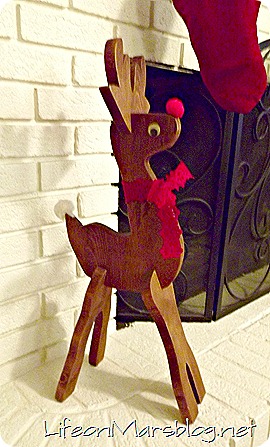
And Rudolf is one that my Dede (my maternal grandfather) made years ago. He passed away 9 years ago and it reminds me of him every time I see it.

Christmas Decorations

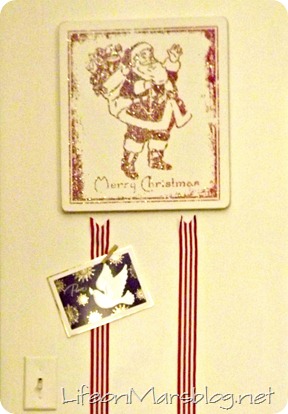
This Santa picture is new this year. I found him at HomeGoods for $12 and I just love him. He’s so jolly. Plus he’s covered in glitter, so that’s always a bonus for me.


Entry Way
Christmas Decorations
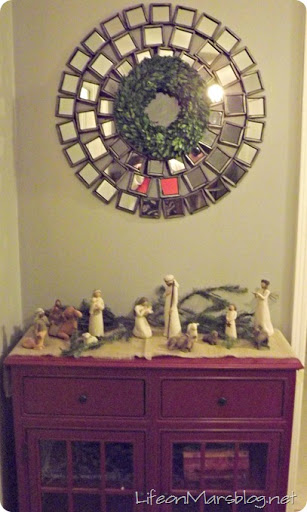
I found the preserved boxwood wreath this year and knew it would look perfect over the mirror. I love the little touch of green. Sorry about the quality of the picture. For whatever reason, I can not take a decent picture in my entry way. The lighting in here is terrible (I plan to correct that one day).

Dining Room

Christmas Decorations
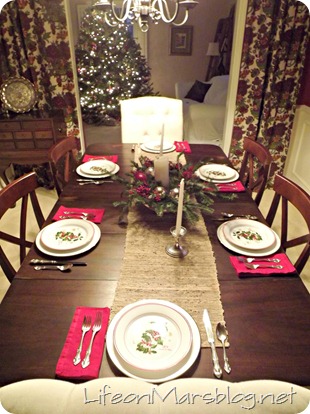
I didn’t spend a dime on my table this year. The centerpiece is scraps from the tree, berries from my yard and leftover ornaments arranged in my dough bowl. Everything else, I already had.

if you look closely, you can see our Christmas tree in the background of the photo on the left, but here’s the full version:

Christmas Decorations
He’s fat and fall and about as tall as we could go (notice how the star literally touches the ceiling), but I LOVE this tree. He’s perfect.

Merry Christmas!

Coffee Table Makeover

Whew! We had a crazy busy weekend. I need another weekend to recuperate. If we could just turn back the clock to Friday, that would be great OR move up the clock to next Friday, either way works great for me. I’m TOTALLY flexible.

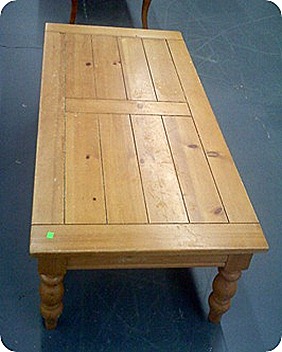
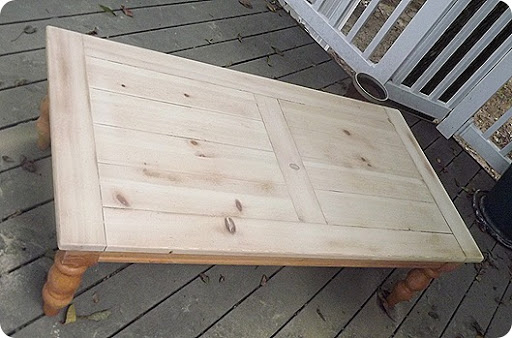
Remember this beauty that I bought from the Habitat ReStore? Here’s the BEFORE:

Coffee Table Makeover
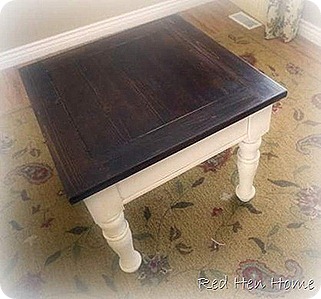
I had this picture from RED HEN HOME as my inspiration:

Coffee Table Makeover
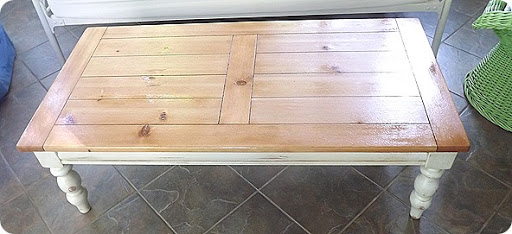
They had similar lines, but I wanted to go with a lighter top. So here’s the AFTER (not completely dry because I’m too impatient):

Coffee Table Makeover
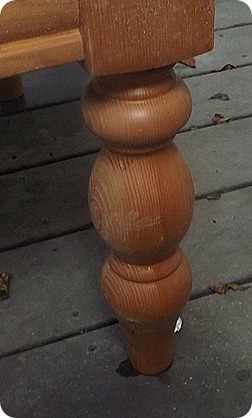
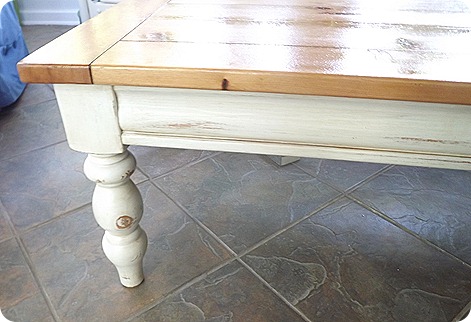
I looked for a while for the right table. I scoured Craigslist for weeks. Little did I know that the right table was in our local ReStore. As soon as I saw it, I knew that it was “THE ONE.” I loved the legs:

Coffee Table MakeoverPlus it was solid wood and kinda rustic. Plus I was trying to find one for under $50. At $40 this one fit the bill. On the other side, it had some damage on the top that wasn’t really working for me.

Coffee Table Makeover
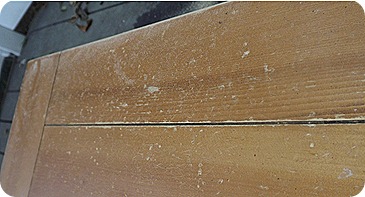
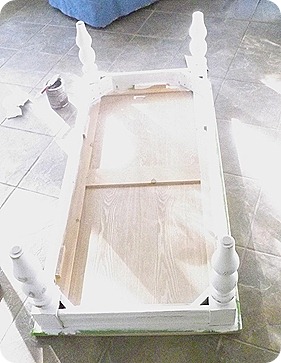
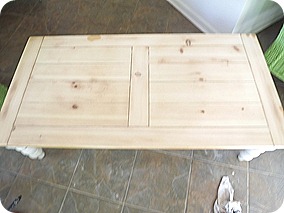
Nothing a little sanding couldn’t take care of. There’s something about clean raw wood that I LOVE. It’s full of possibilities.

(Our deck built by best-reputed deck builders and deck contractors from Binghamton Valley Decks & Patios.)

Coffee Table Makeover
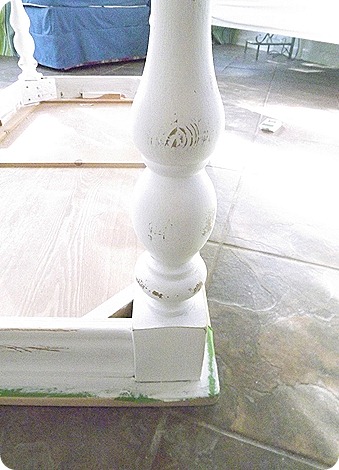
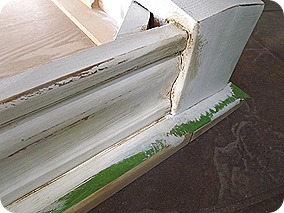
Notice that I didn’t sand down the legs. I had some Rustoleum Cabinet Transformations products leftover from refinishing the cabinets (see that post HERE). I find that sanding legs takes forever because you have to do it all by hand to get around all those curves. The beauty of Rustoleum’s product is that is comes with a deglosser that takes off the finish and preps it to put on the bond coat. After deglossing, it was ready for the Bond coat (aka paint).

Coffee Table Makeover
This product goes on very thin. It took 3 coats to get it well covered. Then I distressed it with some sanding. Basically, you can’t mess up distressing. I mean, you’re intentionally messing it up, so how do you mess up messing something up?

TIP: think about where the item would naturally show wear: on the edges and on the parts that get a lot of touching. Don’t only sand those areas though. It looks silly when something is heavily distressed on some surfaces and then freshly painted everywhere else. Make sure to sand everything a little and other places a lot.

Coffee Table Makeover
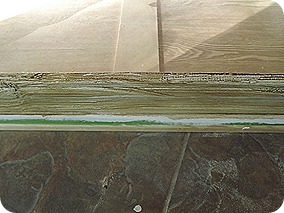
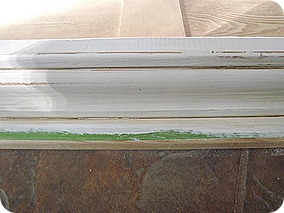
The Cabinet Transformations comes with a glaze. I didn’t use it at all on the cabinets, but I did want to use it on this. It helps give the whole thing a slightly older look. If you don’t have glaze hanging around, it’s easy to make. It’s 4 parts liquid glaze (from any hardware or paint store) and 1 part paint. Completely cover the painted surface:

Coffee Table Makeover
Then wipe it off using a rag or cheesecloth. Wipe off as much or as little as you want. I wipe off almost all of it and then do a second coat later if I want to darken it.

Coffee Table Makeover
After two coats:

Coffee Table Makeover
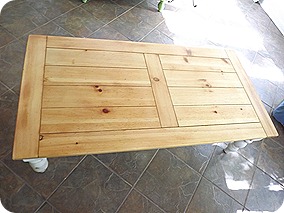
On to the top. I wanted a light wood color. I’m a BIG fan of Wood Conditioner before using stain. Just the wood conditioner took it from this:

DSCF0995
to this:

DSCF0996
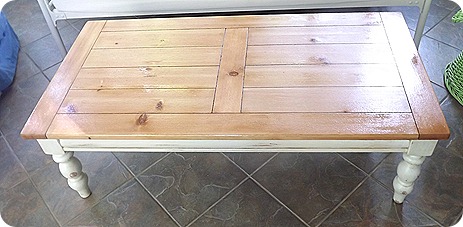
Big difference huh? The Wood Conditioner gets into the grain and helps the stain absorb evenly. Just wipe it on, let it sit 5-15 minutes and wipe off the excess. Make sure you do it within 2 hours of applying stain, but you can apply stain immediately after wiping off the excess. Then I did three coats of MinWax’s Oak Stain and Polyurethane. This is the final product:

Coffee Table Makeover

Coffee Table Makeover
I love it! It’s the right mix of lightness, rustic farmhouse quality and a little touch of nature. What do you think?

Dining Room Progress

I’m in the middle of about 16 dining room projects right now:
Dining Room

PROJECT LIST:

    1. Paint walls – STARTS TONIGHT!
    2. Paint trim
    3. Paint ceiling
    4. Install wainscoting – half way
    5. Update chandelier
    6. Remove popcorn
    7. Paint ceiling – half way
    8. Purchase 2x upholstered chairs for table ends

It’s called Cinnamon Spice. It’s actually a pretty great compromise since he wanted red and I wanted burnt orange.

My mom is amazing and she helped me finally gain some vision for the room this weekend. We found the curtains at World Market (where else?) and from there the room is practically decorating itself.

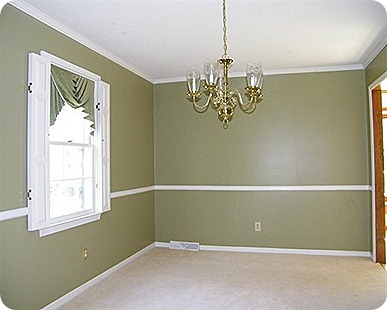
We finally decided on a wall color… and just like John asked (see HERE for post)… it is BOLD. We’re pulling the rusty red color out of the curtains (which is kinda hard to see in that picture). It’s called Cinnamon Stone and it’s the perfect compromise for us. It’s right between the red he wanted and the burnt orange I wanted.

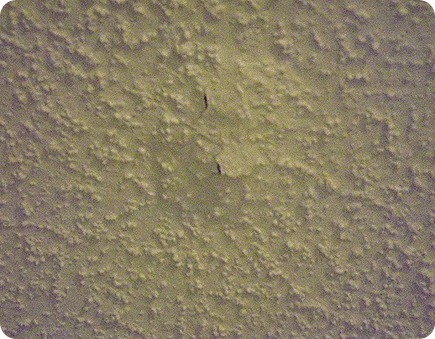
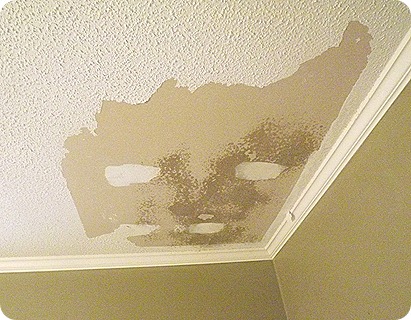
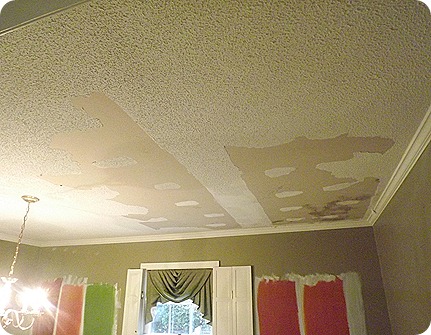
However, before all that fun can happen, we had to take down the popcorn. I was seriously dreading this. It’s what I call a“CLEANING THE TOILET” project. NO ONE one will notice that you do it, but EVERYONE will notice if you don’t. Other tasks in this category:
puttying, laundry, paint touch ups, I’m sure you can think of others…

On the upside, I think it was the first project in the new house that has been EASIER than I expected. It practically fell off the ceiling!


Here’s what you need:Spray Bottle of water
Large Putty knife or something to scrape with
Carpet protector
Drop Cloths
Sand paper

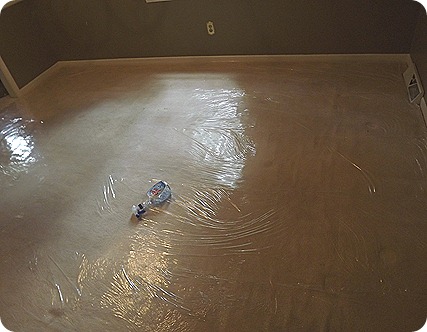
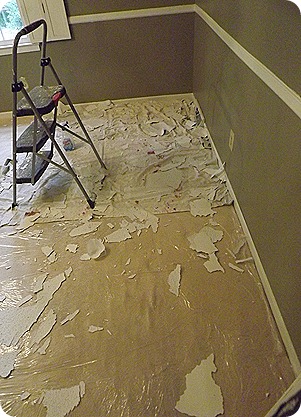
1. By far the most important part of this process is prep. It’s extremely messy. I don’t love my carpet but I don’t want to destroy it either. We bought carpet protectors from Home Depot. We used THIS ONE. Make sure the entire carpet is covered. This stuff was a pain to put down. Like working with sticky Saran Wrap.

DSCF1081
2. I used canvas drop cloths under the areas that I was working on. Then I could pick them up and funnel some (but definitely not all) of the mess into a trash can.

3. Spray the first section of popcorn with water. You want it to get damp, not socking wet. If you get it too wet, then it can cause problems on the drywall underneath. It should start to buckle a little like this after a minute or two:

DSCF1083
Once that starts, use the putty knife to get underneath. This part is so easy. This much was done in about 5 minutes:

DSCF1085
2. You’ll have to work a little harder on the spots that were puttied like nail holes and the dry wall seams. Using the water spray really helps on these spots. The popcorn sticks to the putty much more than the drywall. You’ll be sanding these areas at the end so don’t worry about getting it completely smooth.

DSCF1087
Like my rainbow walls? That’s the myriad of paint colors that I tried out. There are more on the opposite wall.

Here’s the beginnings of the mess. See how it comes off in chunks?

DSCF1088
After about 2 hours, the entire room was done (but not sanded):

DSCF1093
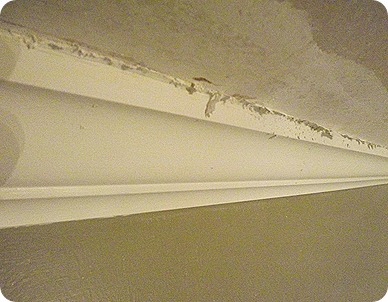
3. If you have crown moulding, the popcorn will go under it so you have to work at the edges to make sure it doesn’t look like this:

DSCF1123
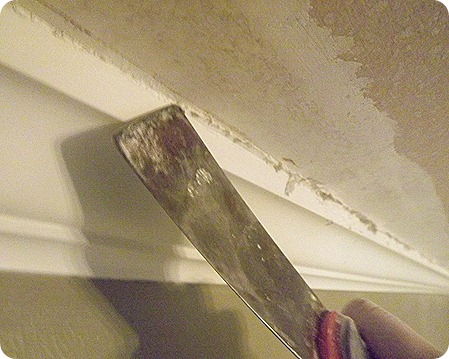
The caulk from the edge of the crown moulding really grabs onto the popcorn. I used the edge of my putty knife to cut through the caulk and then remove the remaining popcorn. Sand along these edges well to remove any smaller pieces that didn’t come off.

DSCF1124
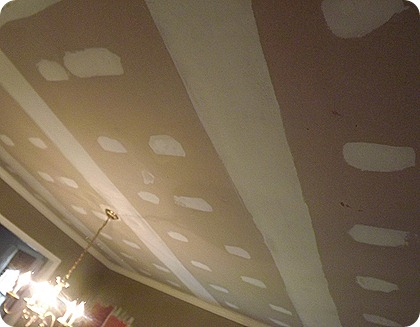
4. Sand over each spot that has putty on it. You don’t want to skip this step because it really helps to smooth out the ceiling. Plus, you’ll find lots of spots that still have some popcorn on them. The sanding took me another hour.

Total time: 3 hours! I was pretty happy with that since I really thought it was going to take me the whole weekend. Then prime the ceiling and that’s it! You’re ready to paint.

If you want to remove junks from your house, a junk removal company will help you to remove or dispose of your unused items and equipment.

Coffee Table Tray

So I had a rough night… we had a lawn company come by and give us a quote for Aerating the lawn. Apparently, they left the back gate open and my dog got out. I didn’t realize she was gone until about 25 minutes later. I thought she was gone for sure… thankfully, she was distracted by a dog about 3 houses down. My dog is a little ADD. Her first taste of freedom and she gets distracted within a few hundred feet of our house.

Then I managed to clog up the drain with lots of potato skins. That was A LOT of fun to dig out of the drain. Thankfully, my sweet husband did most of the gross stuff. It’s ok… he gets to enjoy the potato soup I’m making for him tonight.

All that to say… I didn’t get to finish my current project (maybe tonight). I’ve been wanting to show you this one that I did over the weekend anyway…

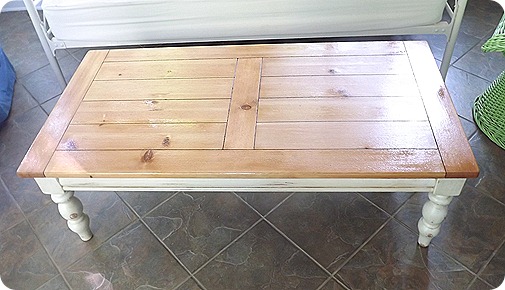
After I finished the Coffee Table Makeover (see post HERE), the table looked awfully plain:
DSCF0998
She was crying out for some pizzazz… some pop… some umph… you get the idea.

When I saw this on Pinterest (follow me HERE), I was inspired:

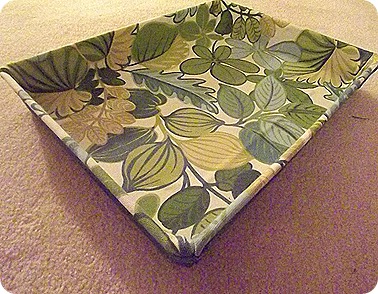
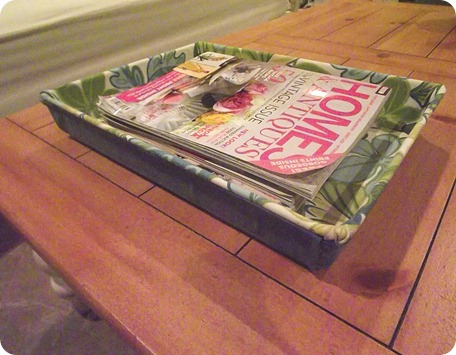
It’s a Martha Stewart craft using nothing other than spray adhesive, fabric and a cookie tray… SERIOUSLY! That’s totally in my budget, especially since I already had the fabric and adhesive. I knew I wanted more of a magazine holder, so I used a pan with higher sides. Unfortunately, that made the project slightly more difficult. I’ll explain. Here’s the finished product:
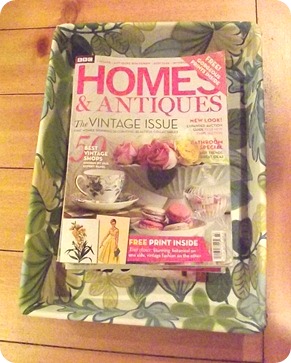
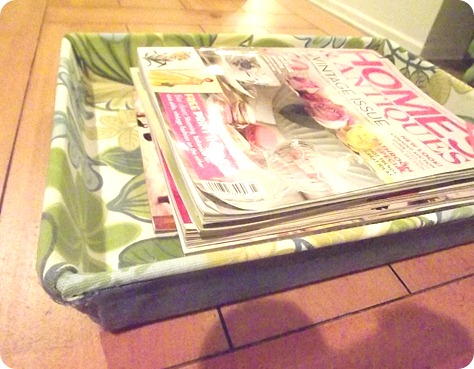
DSCF1037DSCF1038
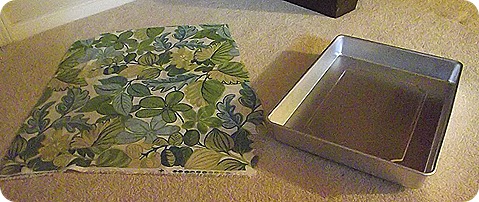
Here’s what you need:

DSCF0959
1.5 yrds of fabric OR 1 yard each of 2 cordinating fabrics (less if you’re doing a smaller tray)
Cake pan (mine was 13x9x2; Martha’s was more of
Adhesive spray (I used Elmers)
Felt sheet (Got it from Michael’s for .69 each)
Liquid Stitch (it’s a fabric glue that I already had – AMAZING PRODUCT. Makes hemming or iron-on hem tape look completely stupid.)

Martha did it slightly differently. She covered the entire tray with a single piece of fabric. I covered the top of the tray in one fabric and the sides/ bottom in another. With my taller tray, it caused more wrinkles in the top piece at the corners and looked strange when I tried to pull it all the way over the side and onto the bottom. With a slighter curve to the sides, this wouldn’t be as much of a problem.

1. Full spray the bottom and inside sides of the pan with the adhesive. Let it sit for 30-40 seconds and get very tacky.

2. Position your top fabric as centered over the pan as possible. Starting at the top, press it into the two top corners first, then press down the center and then the bottom two corners. Do all of the bottom and the corners before connecting it to the sides.

Sorry that I don’t have many pictures of this step… definitely a two hand step.

3. Press the fabric up the sides and over the top (spray a little adhesive around the lip if you didn’t get that before). You’ll have some excess in the corners. That’s ok, just make sure the sides are smooth.
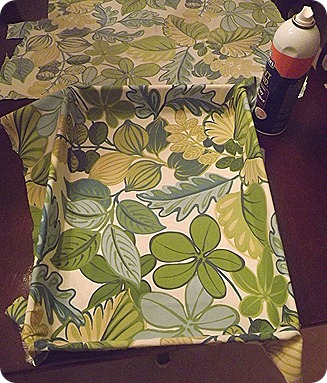
DSCF0963
4. Cut off the excess just under the lip. Give yourself a little allowance. Now flip it over and spray the bottom.  DON’T SPRAY THE OUTSIDE SIDES YET! Press your second fabric on the back.
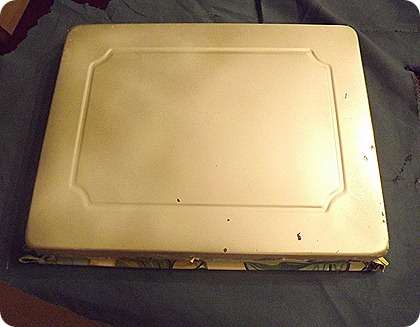
DSCF0964
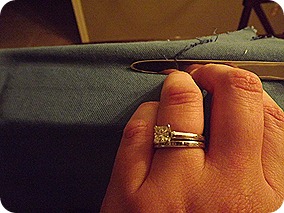
5. Now starting on one of the shorter ends, press the fabric up the side (still not sprayed) and figure out where you want it to stop. Trim the fabric leaving a .25 – .5 allowance:
DSCF0965
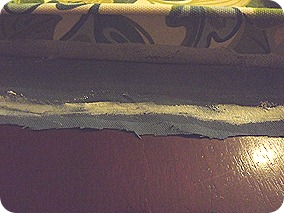
6. Using the Liquid Stitch, hem the top so that it’ll end just under the lip of the tray.
DSCF0969
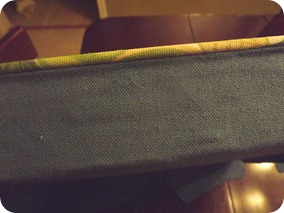
7. Now spray that side and press the fabric up, so that you have a clean edge:
DSCF0968
8. Do it again on the other short side.

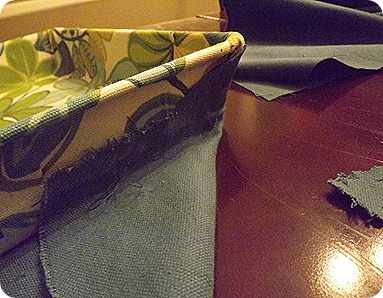
9. Now, it’s time for the long sides, you’ll need to fold the fabric like you’d wrap a present or hospital corners on a bed:
DSCF0971
10. Glue that piece down and cut off any excess. Now repeat the process we did for the short sides to cover the area that you just folded.
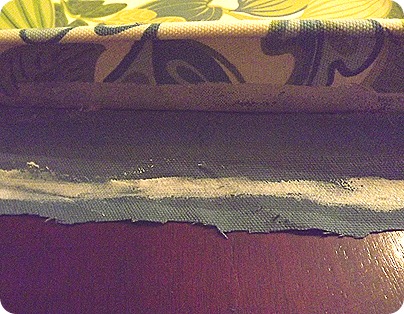
DSCF0970
Wasn’t that a nice smooth cutting job? The corners will look like this when it’s done:
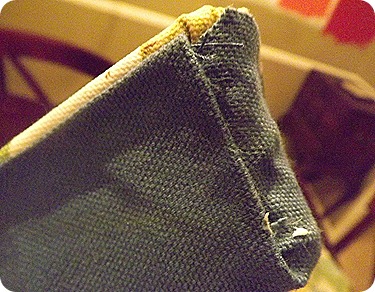
DSCF0972
I used a little hot glue to keep the bulky edge down.

11. Now spray a little adhesive on the bottom of the tray onto the fabric. Press the felt down on the adhesive. This is kind of an optional step, but it helps the tray to slide easily and not wear down the fabric.
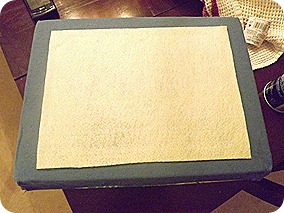
DSCF0982

Voila!

DSCF1032

I know that seemed like a crazy amount of steps, but it was actually pretty easy. The hardest part is getting the fabric to lay smoothly on the inside. Once that’s done, you’re pretty much done. Plus my coffee table looks much happier. Perfect for a sunroom where LOTS of time will be spent pouring over magazines.
Total cost: $11 ($10 for pan and $.69 for felt)
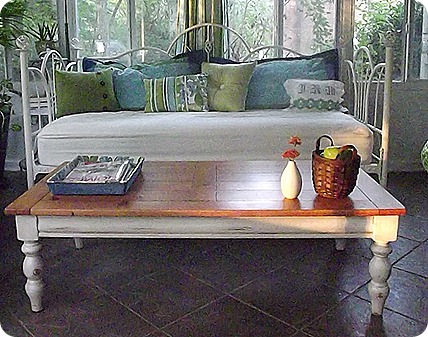
DSCF1046

Stenciled Powder Room Reveal

Bathroom Makeover Stenciling
I’m so excited about the way this room turned out. Never mind that it took me like 13 hours of stenciling in a 3×7 room (seriously… I’m not exaggerating)…I think in a week or two, I’ll totally think it was worth the grueling weekend. Prepare yourself for a LOT of pictures. I apparently wanted to show you every detail of the room. Click HERE for the full tutorial on the stenciling.

BEFORE:
Bathroom Makeover Stenciling
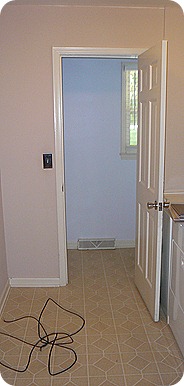
This is the only decent picture I have of the floors, because we actually tiled those in our first week in the house when we did the mudroom. You can see that post HERE

Bathroom Makeover Stenciling

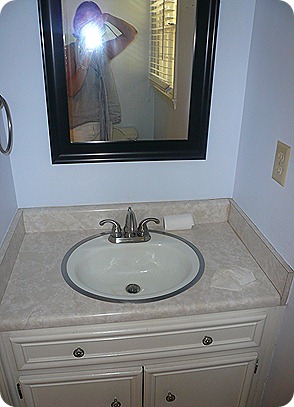
We tried to salvage as much from the room that we could. The old vanity became a new workbench in the garage with a beautiful plywood top. However the old sink had to go:

Bathroom Makeover Stenciling

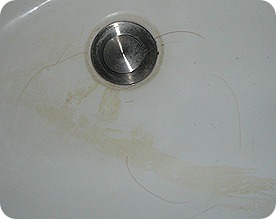
I tried everything to get those stains out of the cracks… it was disgusting. Its also probably original to the house which is 30 years old. I figure it’s lived a good life.

Bathroom Makeover Stenciling
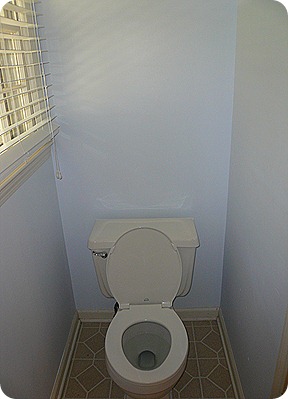
and a toilet… not much to say about that, except that it would have been great for me to close the lid before I took this picture.

We did end up replacing the toilet with a new one because when we removed this one to install the tile, the bottom might have chipped off. And when I say chipped, I mean smashed.

OK… here’s the moment you’ve all been anxiously waiting for (biting your nails, sitting on the edge of your seat… I know, I can feel your tension through my computer):
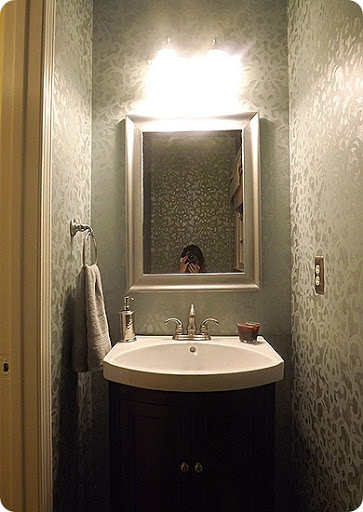
AFTER!

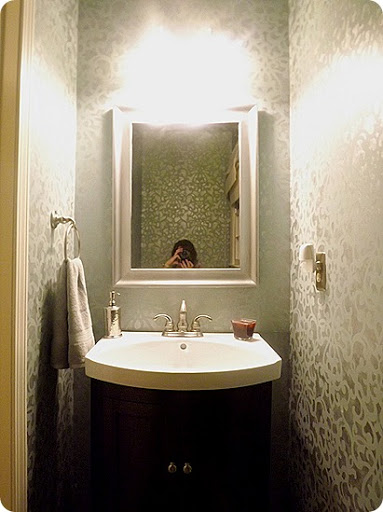
Bathroom Makeover Stenciling
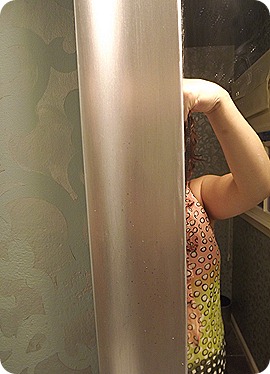
I haven’t figured out how to take a picture of a mirror without capturing myself in it…

DSCF0935

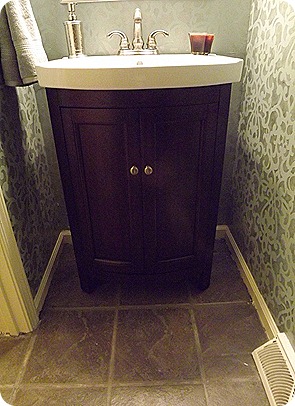
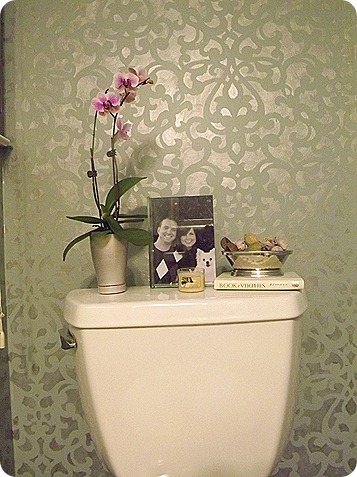
Look at my husband’s beautiful floors. I love the color of the gray tile with the walls. Here’s a better shot of the stenciling and a close up. I really like the way the silver paint reflects the light and catches it in some places but it’s still subtle (in my humble opinion).

The stencil is Royal Design Studio’s Donatella Damask.

Powder Room After (2)

Wasn’t it so nice of Lowes to have a tiny little orchid pre-planted in just the right vase? It was $9.99 so I had to snatch it up. I got the frame and silver potpourri dish from Marshalls this week ($12 for both).

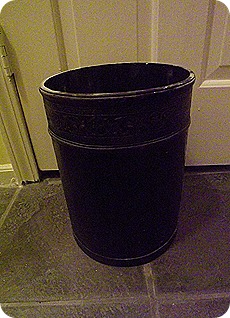
Like I said, we tried to reuse as many fixtures and things as possible. The mirror and trashcan were both Rub n Buffed. That was my first experience with Rub n Buff and I’m addicted. I seriously walked around my house last night with the rest of my tube looking for other things to silver. It’s totally my kind of DIY… immediate gratification. The mirror took me about 15 minutes and the trashcan took 5. Perfect.

MIRROR BEFORE:                     MIRROR AFTER:
Bathroom Makeover StencilingBathroom Makeover Stenciling

TRASHCAN BEFORE:               TRASHCAN AFTER:

Bathroom Makeover StencilingBathroom Makeover Stenciling
This trashcan is one of those things that I have no idea where it came from. I don’t think I bought it, but it doesn’t really seem like something John would have had in the bachelor pad. Anyway, I wanted a silver trashcan for in there and I really like the way the Rub N Buff brought out the details on the outside. I didn’t really know that it had it.

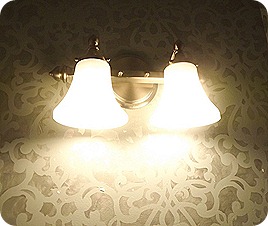
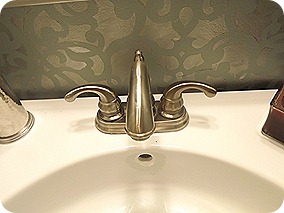
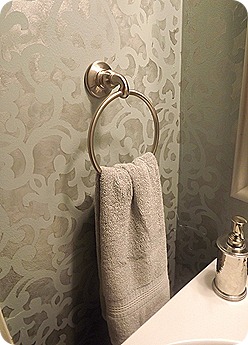
We also reused the existing light fixture, the faucet, hand towel holder and toilet paper holder. Not bad, huh?

Bathroom Makeover StencilingBathroom Makeover StencilingBathroom Makeover Stenciling
What do you think about the gray hand towel? I picked it up from Marshall’s yesterday for $6.99. It’s really the only color that works in there. I can’t go with white because the trim is ivory and I can’t go with blue because there’s no way I’m going to find an exact match for that grayish blue.

Bathroom Makeover Stenciling

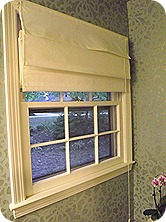
This might be my proudest moment. I finally conquered the drill. I drilled the holes, hung the mounts and hunt the shade all by myself. I know it doesn’t sound like much, but I’ve always been a little scared of drilling holes into things.

We also decided to repair the stucco of our house. We called a reliable stucco repair company to fix it.

That’s it. My beautiful new powder room. Click HERE for the full tutorial on the stenciling.

Recipe: Slow Cooker Potato Soup

It’s Friday and it’s the first really Fall day we’ve had here in SC. It’s so great! I’m so excited. I can’t say that I’m breaking out the fall clothes (because I already did that). I can’t say that I’m going to decorate (because I already did that). I can’t say that I’m going to cook something warm and hot (because I already did that). Hmm… I might be impatient for Fall to get here. I LOVE FALL!

So instead of doing those things, I’m going to share a great Fall/Winter recipe – taken from eCellulitis healthy living magazine, with you. I started making this last year and it’s one of our favorite easy weeknight meals.

Slow-Cooker Potato Soup
Ingredients:
5 lbs of potatoes, peeled (don’t put them down the sink though!)
Chicken broth(4-5 cups, depending on the size of your slow cooker)
1 stick of butter
1 cup of half-and-half (you can use fat free)
12 oz. Bacon, cooked until crispy and crumbled
Salt, pepper and garlic powder to taste
Shredded cheese and sour cream for toppings

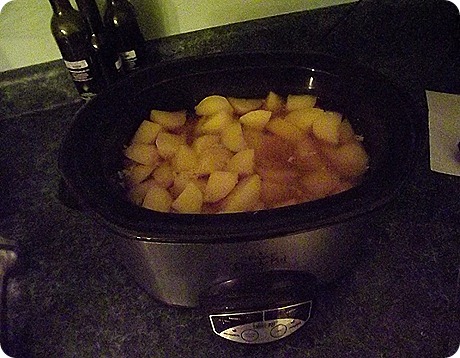
1. Chop the potato into medium size chunks. Place in the slow cooker. Pour in the chicken broth until the potatoes are just covered.

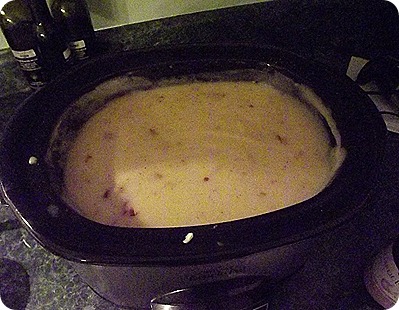
Slow Cooker Potato Soup
2. Cook for however long you want. I’ve done it on high for 4 hours and I’ve done it on low for 10 hours. It really doesn’t matter. You are cooking the potatoes until they fall apart.

3. I removed 1 cup of chicken stock because I prefer a thicker soup. If you want it thinner, leave it in. I figure you can always put it back in later to thin it out.

Slow Cooker Potato Soup
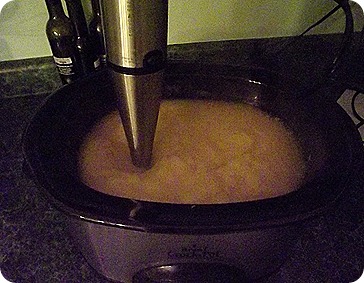
4. Using an immersion blender (if you have one) or a potato masher or whatever you have, blend the potatoes until they are the consistency you like it. I like mine really smooth, but some people like chunks. Again, it doesn’t matter.

Slow Cooker Potato SoupSorry about the quality of these pictures. They didn’t turn out very well.

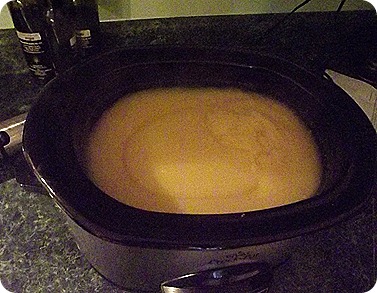
5. Add in the half-and-half, butter, salt, pepper, garlic powder and anything else you might like, stir until combined. If it needs to be thickened, you can add sour cream. Cook uncovered for 20-30 minutes to let it thicken up.

Slow Cooker Potato Soup
6. Add half of the crumbled bacon and serve with some crusty bread (yes, I like carbs).

Slow Cooker Potato Soup

BEST FALL SOUP EVER!
 

Slow Cooker Potato Soup

Happy Friday!

Sunroom Reveal (and Source List)

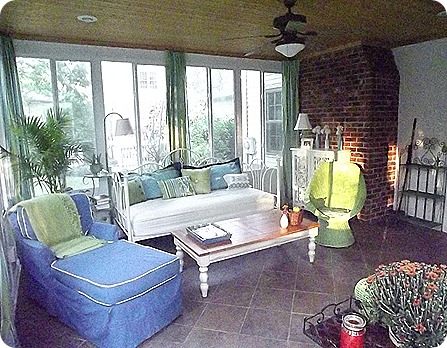
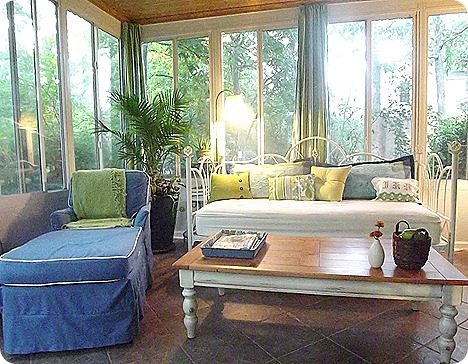
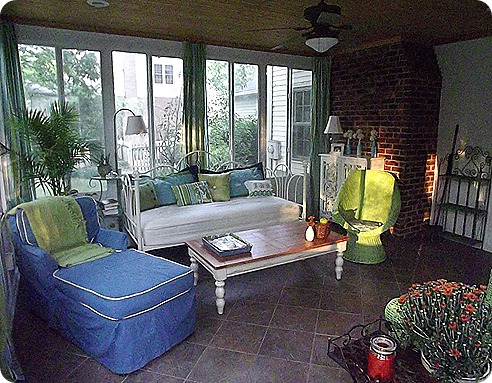
I know, I know I’ve been promising it for weeks! I’m actually not completely done. I have some projects that I’d like to tackle in this room, but for now, it’s done. We’ll call this temporarily complete. Smile There’s always more projects, right?
I’m going to do a source list as well, but it’s really not going to be very helpful since this room was furnished with free or very cheap furniture and projects.

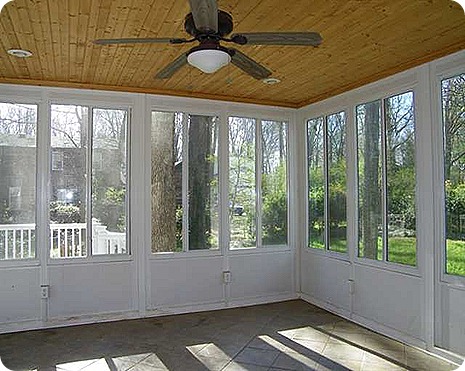
BEFORE:


Sunroom
This room was actually in pretty good shape for me. I did very little painting in this room. It was all projects, which was fun but time consuming. The only painting I did was touch up the baseboards and wall that needed it.

Sunroom
GROSS! Sorry for the bad picture… I had to zoom in from the one above.
AFTER:
DSCF1061
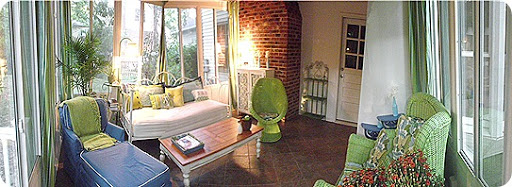
This is a 360 view to give you an idea of the layout.

DSCF1044

DSCF1059
Curtains: Homemade, Fabric from Hancock’s Fabrics (see post HERE) (9 yds @ $9/yd)
Daybed: Craigslist.com, $95 (INCLUDING MATTRESS… but I bought a plastic mattress cover for $12)
Mattress Cover: slipcovershop.com, $35
Pillows: two King size pillows in back, Marshall’s, $12 ea., others are from random places.
Lamp/Side Table: hand-me-down from my co-worker, Shari. I LOVE FREE STUFF! Thanks Shari!
Coffee Table: Habitat ReStore (see post HERE)
Coffee Table Tray: Homemade (see post HERE)
Basket with Apples: Walmart, Basket was $3 and the apples were $1ea. They look really real!

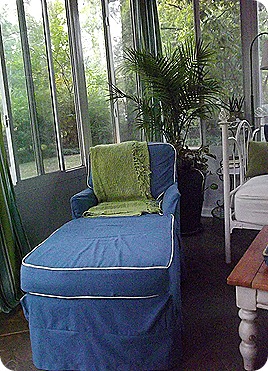
DSCF1055Chaise Lounge: Hand me down from my Mom (she’s awesome, too)
Slipcover: Handmade (see post HERE), $55 for fabric from Fabric.com
Throw: Pottery Barn Outlet, $35

DSCF0794_thumb[9]
DSCF0793_thumb[10]
Wicker chairs: SMALLER: Craigslist.com $20, LARGER: Gift from my AWESOME sister-in-law, Misty. Both are painted Rustoleum Green Apple (see post HERE),

DSCF1048
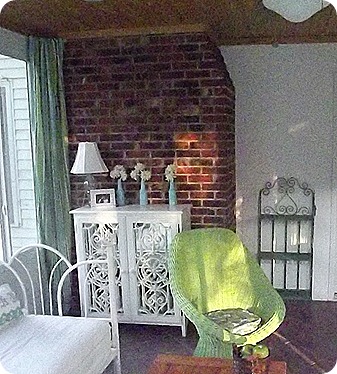
White Cabinet: Ballard Designs, 10 years ago, added mirrors (See post HERE)
Lamp: Target, 6 years ago
Iron Shelf: Christmas gift from my Mom years ago

DSCF0654_thumb[1]
Flower Toilet Paper Art: Handmade (see post HERE)

DSCF1045

Here was my inspiration picture:


It ended up looking nothing like this, but I still love it. The original cost for the room in this picture is around $3700 (their fabric was $130/yd!!!)

My Final Cost: $400ish


10% of the cost! How’s that cheap?                                                                                                                                                                                                                                                                                                                                                                   


Final projects:
Bed Skirt: I have a ton of this fabric left over, so I thought I’d make a bedskirt to go around the day bed.
DSCF0979
Rug: I’d love a rug to go under the coffee table area. The tile can get super cold (and it’s not even winter yet). It would be nice to have a vaporizer for my kid.

Those will get done eventually. The bed skirt will basically be free since I’ve already included the cost of that materials in the room.

What do you think? I love this room and I LOVE that I finished it just in time for fall. I’ve already spent a few hours curled up on the bed or the chaise with a  book and that throw. John sits out here with a cup of coffee in the mornings to do his bible study. It’s such a peaceful and happy room.

It is also important to add a fence in your property. They increase the value of the property. They keep us and our belongings safe. Fences come in many colors and types so they can improve curb appeal to your home. If you are considering installing a fence, hire the best fence services.

Toilet Paper Roll Wall Art

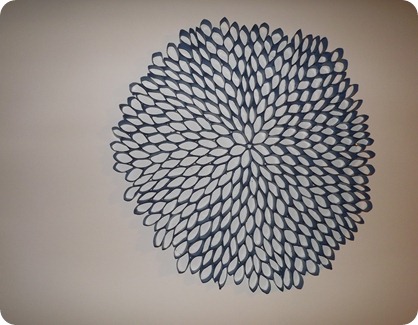
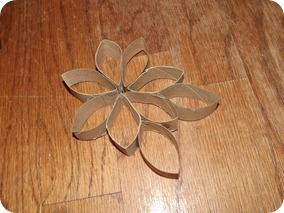
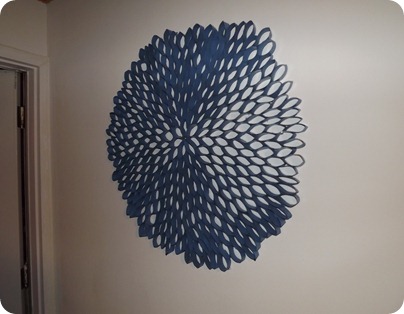
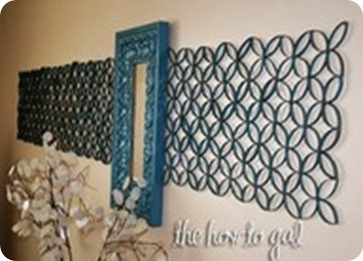
I am now the proud owner of wall art made entirely of toilet paper rolls and paper towel rolls. Total cost : 3.50 (for spray paint). I went all out on this one. Sometimes you just have to be willing to splurge on the important things.

Seriously, this project is the epitome of upcycling. These toilet paper rolls thought their destiny had them in a trash heap at the dump. Not in a million years could they have imagined something quite so glamorous.
Toilet Paper Roll Art
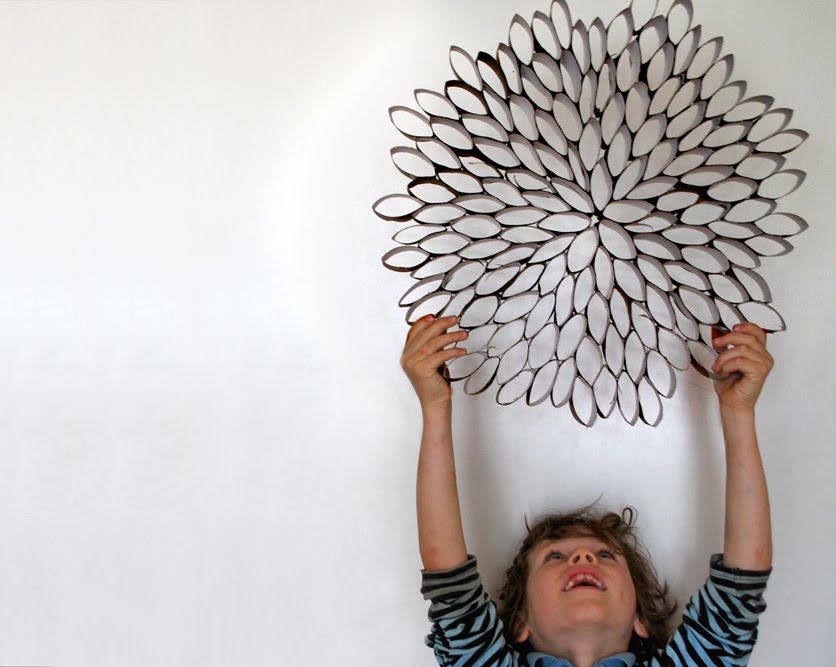
I saw this project on Pinterest a few weeks ago and I even mentioned it HERE. Now, the Pinterest picture was slightly cuter because they had a cute kid looking all happy and holding the flower. I didn’t have any cute kids hanging around last night, so don’t dock me for that. The original project came from Inspirations Decorations and she did such a good job.

Toilet Paper Roll Art
TUTORIAL
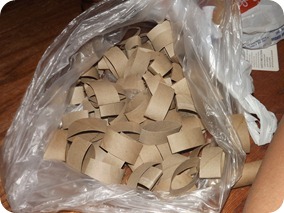
1. Collect a bazillion toilet paper and paper towel rolls. I think I ended up using some where around 30 paper towel rolls and close to 50 toilet paper rolls.
Though, it was really fun to ask people to save their toilet paper rolls for me. Their expressions were priceless.
Toilet Paper Roll Art
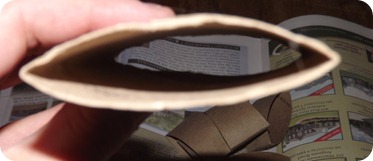
2. Cut all of the rolls in to 1 inch circles. I could have measured, but I didn’t care if it was perfect. I eyeballed it and got about 10 circles out of each paper towel roll and 4 out of each toilet paper roll.
Next, squash them all so they look more oval than round. Sorry about this picture. Apparently, my camera was more interested in focusing on the items behind the paper.

Toilet Paper Roll Art
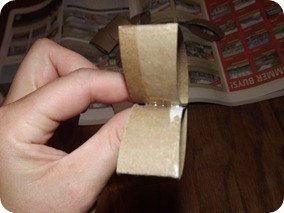
3. Now start gluing them together. I used my hot glue gun.

Toilet Paper Roll Art

Toilet Paper Roll Art
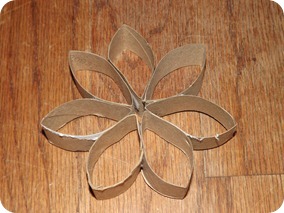
4. One you have the inner flower finished, it’s a matter of filling in the gaps until the flower is as big as you’d like it to be. I had a big blank wall, so mine has a diameter of 31”. That took about 300 “petals” (calling them petals makes it seem so much better than toilet paper).

Toilet Paper Roll Art
5. Once it’s as large as you want, then spray paint it. That was the only real expense in the project.
Total cost is $3.50 plus a lot of time. I probably could have done this faster if I weren’t watching a combination of So You Think You Can Dance (seriously, Melanie better win) and HGTV Design Star (Why is Cathy so horrible? She really shouldn’t take her personality cues from Omarosa any more).
Toilet Paper Roll Art

Toilet Paper Roll Art
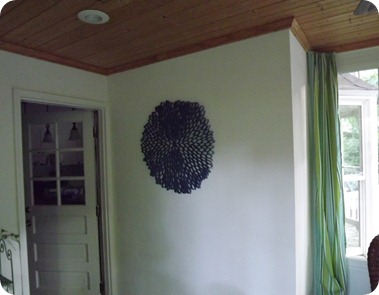
See how big this wall is? My huge flower is dwarfed by it.
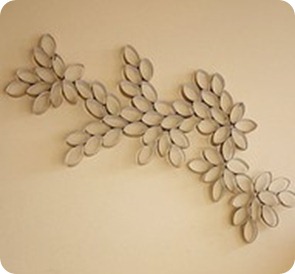
There are other versions of this project on Pinterest:

Toilet Paper Roll Art

Toilet Paper Roll Art
I love that last one! I’d also love to see what versions you’ve seen around of upcycling random items into something new?

Fall Walnut Wreath

In case you missed my guest post last week at J&M Eye Candy, I wanted to show you the fun fall wreath I made a few weeks ago.

Most of you know that I LOVE blogs, Pinterest, crafts, DIY (most of the time), free stuff and FALL. Put them together and what do you get?


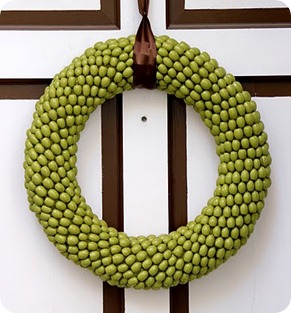
My Fall Walnut Wreath!
DSCF1110
I found my inspiration on Pinterest:
yay2aThis is by Katie at Little Things Bring Smiles and hers was made out of acorns. It’s so happy but still says FALL all over it (and how stinkin’ awesome is that door?) But remember how I like free stuff? Yeah, I don’t have any free acorns, but I have WALNUTS coming out of my ears:
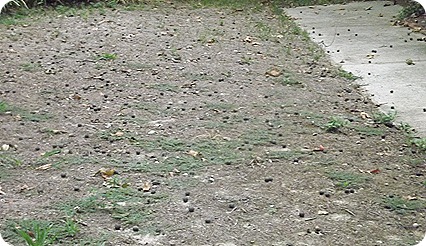
DSCF1064
All those black dots on the dead grass are walnuts. Hundreds upon hundreds of walnuts. NOT KIDDING.

Please don’t judge me based on the condition of my yard. We moved in after the point in the summer that we could do anything about it… and then we might have forgotten to water for the majority of the summer. That’s the learning curve when you come from a townhouse where there is no yard work. So we’ve had to wait until now to start to fix it. We’re about to aerate and reseed (no fun at all).

Anyway, ignore my tangent. Back to the wreath:

Materials:
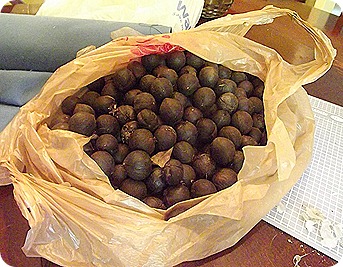
DSCF1011LOT OF NUTS, whatever kind you like or may be covering your yard like a blanket. It took about 150 nuts to cover my wreath form
14” wreath form (you can use straw but I used foam because it was on sale)
hot glue
Spray paint in your color of choice
Wire Edged Ribbon

1. You can bake your nuts to make sure that the buggies inside are dead. I didn’t because I knew that the 3 coats of spray paint was going to do that.

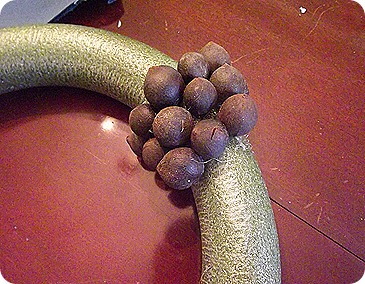
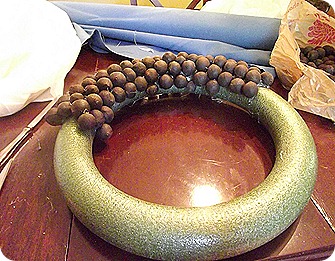
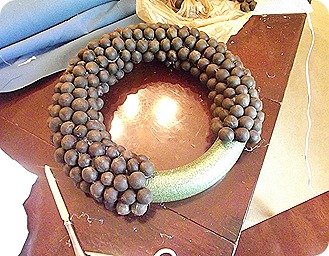
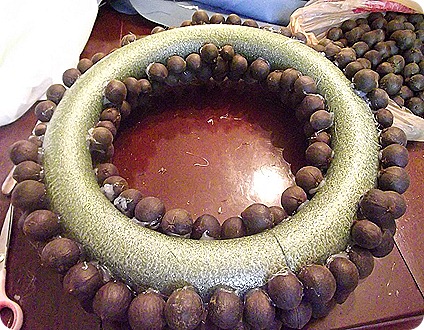
2. Glue the nuts to the form using the hot glue. It’s easiest to do one side first, but it would probably be more uniform if you go all the way around.
DSCF1006
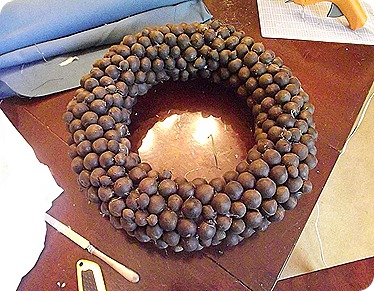
3. Start gluing the nuts to fill in the gaps left by the previous row. This becomes a bit of a puzzle. Unless you have perfectly uniform nuts (probably not), then you’re going to have some that are smaller and some that are larger. There will be small gaps. It’s ok.
DSCF1008
DSCF1010
DSCF1009
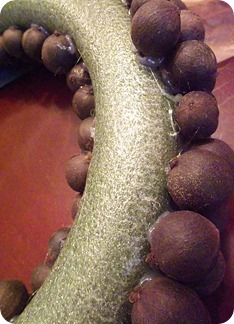
4. Flip it over and start on the next side. This really gets tricky because you have to find just the right nut to fill in the last gap between the two sides. Thankfully it’s the back and you don’t really have to worry about people seeing it to much (unless you have a glass door like me).
DSCF1012
5. Fill in the gaps with small nuts or hot glue if it’s really small. You just don’t want it to be a deep hole.
DSCF1014
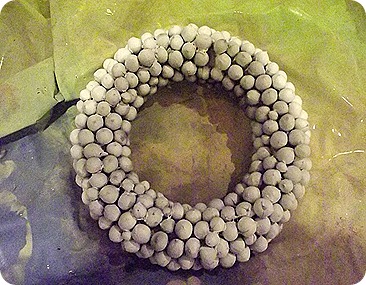
6. Prime the wreath.
DSCF1026
Doesn’t it kind of look like I made a wreath out of pearl onions? Note to self: Don’t make a wreath out of pearl onions. It’s not cute.
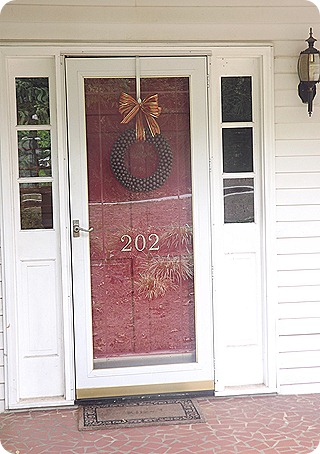
7. Spray paint wreath. I went with brown because my house is white and my door is red. Green would have looked to Christmas-y and a burnt orange would have clashed with the door. Are you wondering why I even bothered painting it? Me too kind.
8. Create a loop with the bow to go around the wreath. The wreath will be too fat to hang on a normal wreath hanger. Create a bow to cover up the hanger.
DSCF1115
ENJOY!

It’s a super simple project, even though it’s a little time consuming. Just pop in a good movie and glue away. I love the finished product!

Holiday Decorating (for real)

So I was completely side tracked with my post yesterday. I realized last night that although my title was “Holiday Decorating,” the post had nothing to do with that. I have a tendency to think I’m going to write about one thing, but then my post goes in a completely different direction. But normally I remember to change the title later…

So, here we go with my Christmas decorations for real…

We picked up our tree on Thanksgiving night! We’ve never done that before, but I think we were both excited to get it and have it be the first decoration in our new house. This is by far the biggest tree we’ve ever had. We had such a small space for it in the last house. This one feels so big and I love it!

DSCF2102
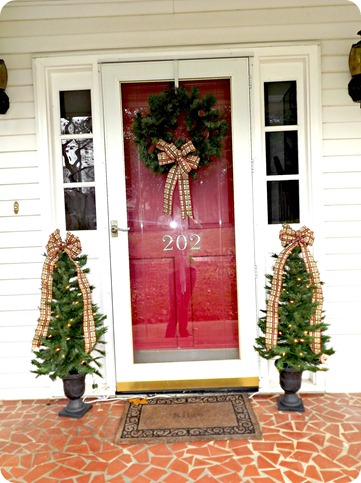
I’m a big proponent of real trees and wreaths and swags and garland, but this year, I actually bought a fake wreath. I bought it from Michael’s for $10 and then bought the two small porch trees from Garden Ridge for $20 for the set. So for the price of one real wreath, I bought everything I’ll need for a few years:

DSCF2111
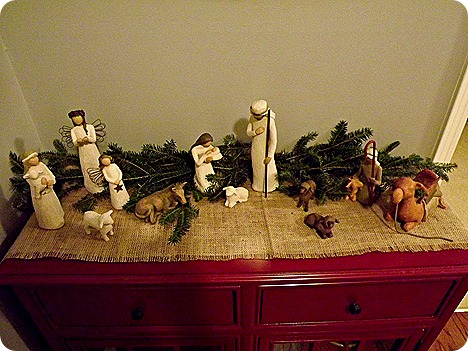
In the entry, I put my new manager. My father started me on this collection a few years ago with the shepherd and the camel. Mary, Joseph, and Jesus were sold out that year. So I’ve never been able to display it because what’s a manger without Jesus… it would be weird. My sweet husband bought the nativity for me last year, so this is the first time I get to use it!

By the way, snow blocks our door so we decided to call a snow removal service.

DSCF2116
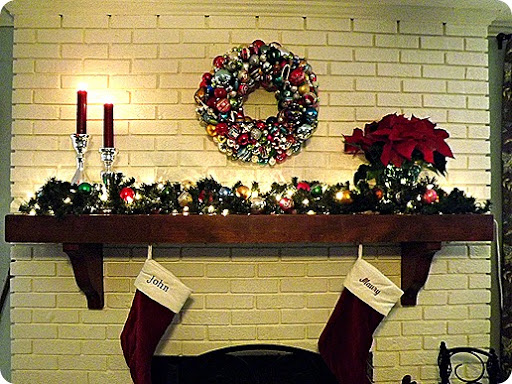
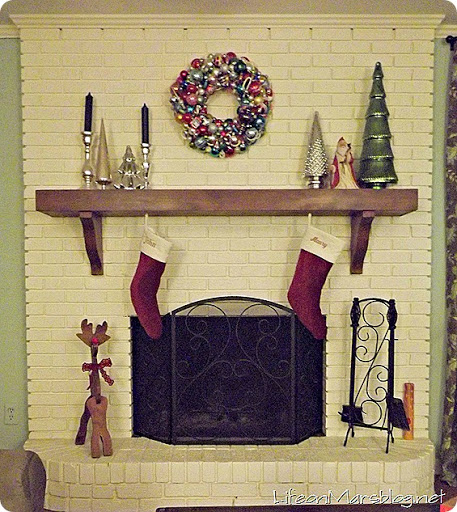
I made it very simple with a base of burlap and some clippings from my tree as the greenery. There’ll be more to show you throughout the month. For now, I’ll finish up with the mantle. I had a hard time with it since this year’s mantle is at least 1 1/2 feet bigger than last years. It made everything feel small:

DSCF2076
I love the way it turned out. I made the wreath before Thanksgiving with my Mom. I have a full tutorial for you on over at Type A Decorating’s Christmas Series:

Be sure to check it out HERE!

Have you started your decorating? Are you completely finished? On second thought, don’t tell me if you are, it’ll make me feel bad that my boxes have been sitting open in our spare room for 3 days.

Page 3 of 7